Back in April of 2013, my family stretched a bit to buy our very first new car, a Jeep Grand Cherokee Limited. Sure, buying used is responsible, but with our Grand Cherokee I knew the car had a perfectly clean bill of health, and I was able to plan the last 11 years out to make sure I wrung every last penny from the machine. Just the other day the Grand Cherokee rolled over 187,000 miles. Here’s how I got there, and how I plan to keep the Jeep going for years to come.
Before we all start with the Just Empty Every Pocket silliness, allow me to assert that I am very satisfied. The Volvo S60s my Jeep replaced were constant money pits of novel and expensive failures, and I got tired of playing automotive whack-a-mole.
So, yes, I like the WK2 Grand Cherokee; it’s been much less troublesome than the stereotype would have you believe. I have an obligation — one that is good for the planet and my pocketbook — to use this thing entirely up, and so far, that’s going quite well thanks to some hard work.
A Car’s Midlife Crisis
Automakers are exceptional at building vehicles that cover about 80,000-120,000 miles with mostly oil changes and inspections; I tend to think cars hit a mid-life crisis when all the wear items…wear out after about 7-10 years of driving, on average. And 7 years is conveniently about the duration of the average new car loan. (It’s not your imagination that problems start to pop up just after you pay off your car!)
With everything loose and rattling, many people give up. Covering a bunch of miles makes a car feel old, and fixing all the resulting wonky bits can add up to a few thousand bucks all at once. But you don’t have to hop on the merry-go-round for another spin at the dealership. Don’t you owe it to yourself to get every last penny of value out of the thing you just spent over half a decade paying for?
[Ed Note: I agree that front-end work is the big-ticket item that wears out often about 10 years (or so) in. In fact, I bought two 2009 cars — a Nissan Versa and a Chevy HHR — and I knew that was the first thing I’d have to tackle on both cars. Fluids and belts and brakes are also in there, but it’s the front end that I consider the most significant in the way it affects the driving experience.
Once I did it on the Nissan/HHR, they both felt brand new. -DT].
How To Make Your Old Car Feel New
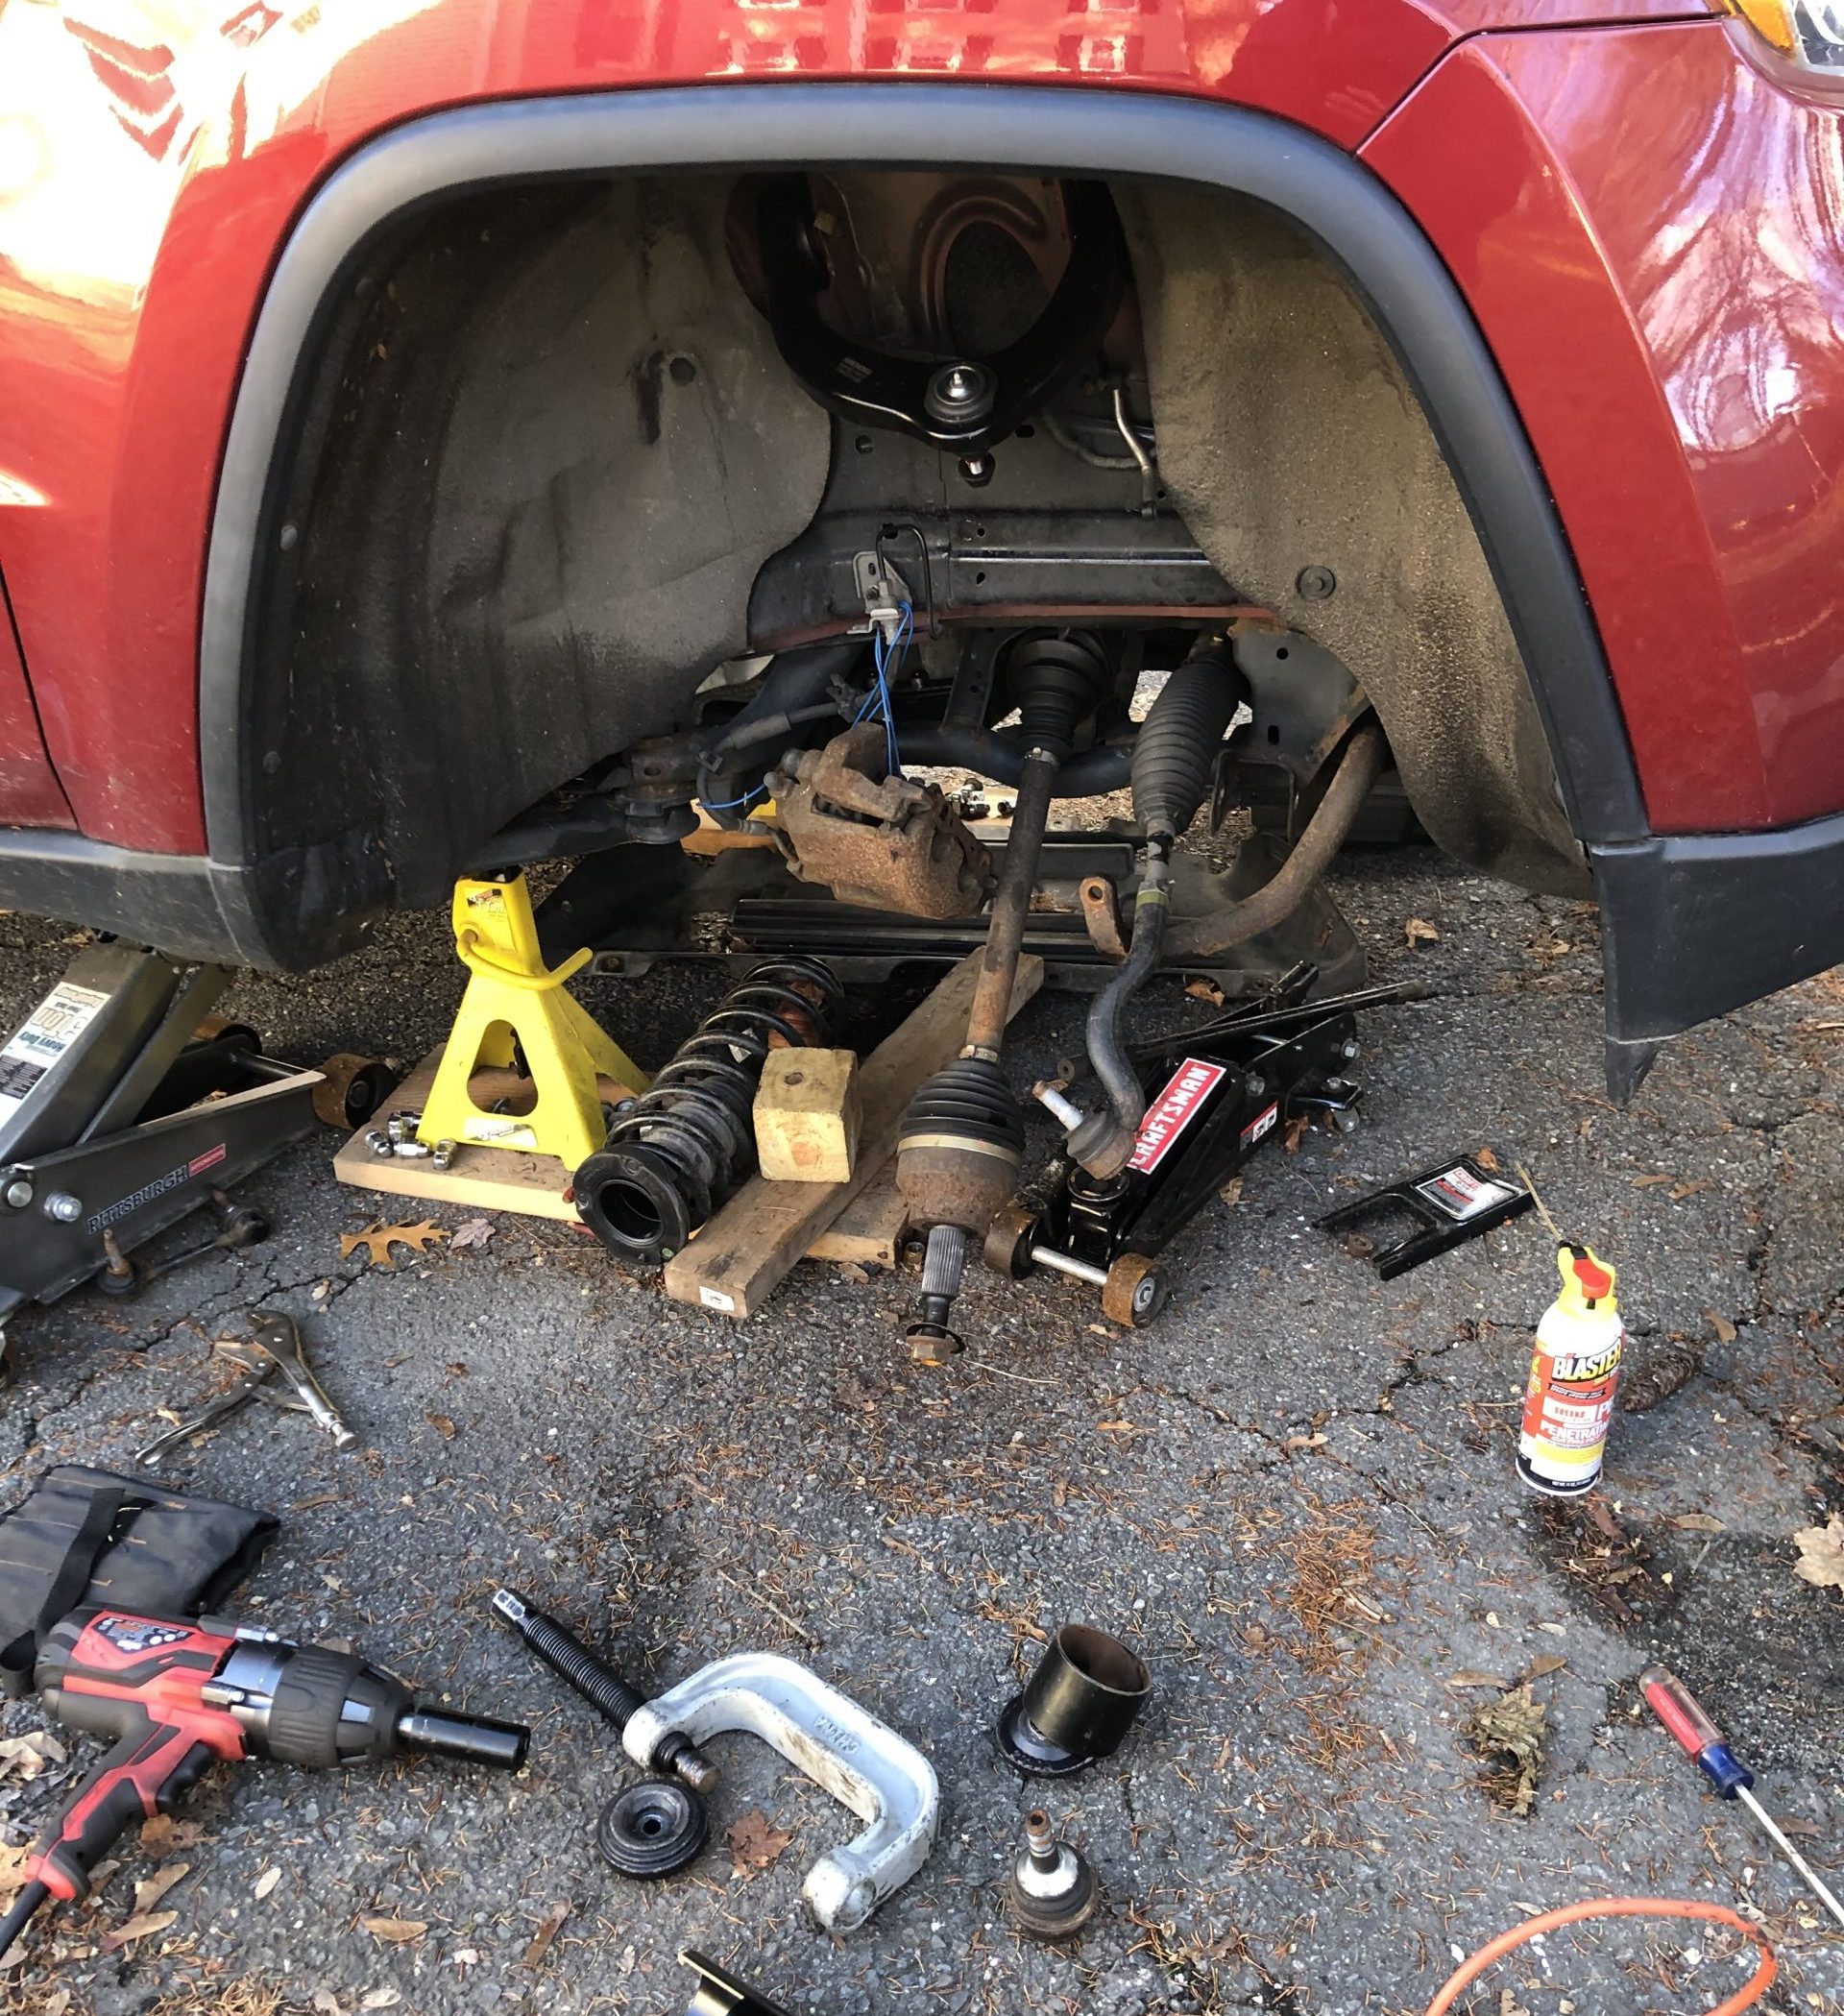
Yes, it’s about money and time. Adjust the proportion of one to reduce the other. I’ve already shared my Pentastar Tick repair, and, unsurprisingly, after more than 150,000 miles of supporting a 4700-pound vehicle, everything that moves in the front end began showing its age, too. (I was pleased it all made it to 150K).
So out to the Massachusetts driveway I went. In late November. With hand tools.
Fixing loose steering and suspension bits isn’t actually that bad. With some labor and muscle, the WK2 suspension is pretty easy to service. This is ambitious for a beginner, but if you know your way around a bit, you don’t have to be frightened. Even if you’re not going to DIY, it’s good to know what a shop is going to do when you ask them to repair this stuff.
Peering beneath your car can be bewildering. There’s going to be lots of mentions of ball joints, bushings, control arms, and other words you may have heard, but may not be able to define. This old video from Jason Fenske’s Engineering Explained channel is a great starting point. [Ed Note: Our resident suspension engineer, Huibert, wrote a piece titled “How A Car Suspension Works: The Basics From The Man Who Designed The Tesla Model S And Ford GT Suspension (Me).” It is excellent. -DT].
The big failure points are tie rods, struts, springs, ball joints, and wheel bearings.
The tie rods connect the two front wheels together via the steering system— in this case a rack and pinion. There are inner tie rod ends, which are basically another form of a balljoint with a long rod attached. The outer tie rod ends screw onto that rod and have another balljoint that connects to the spindle/knuckle, which is an assembly that serves as the attachment point for the struts, suspension arms, and wheel hubs. A wheel attaches to that hub, which contains bearings and allows the drive system to provide power via the axle, which articulates through a range of motion thanks to its constant velocity (CV) joints. They extend and compress a certain amount as the suspension moves up and down through bumps.
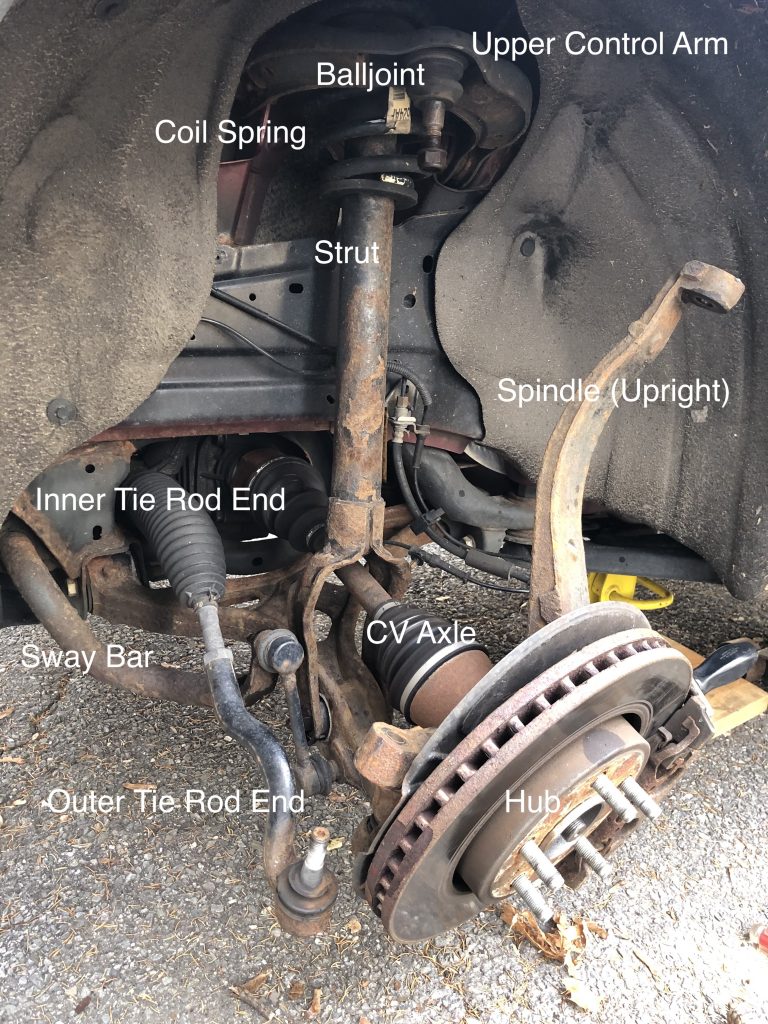
There’s lots more to know about suspensions, but this info provides enough background for the ground we’re covering in this article. There will not be a quiz.
I Pregamed
The job balloons quickly, because taking apart the front end presents a lot of “while you’re in there” items that are worth refreshing — that way, you only have to take it all apart and then pay for an alignment once.
I liked the factory ride, so I ordered the OEM Mopar struts (made by Tockico). I didn’t want Bilsteins or Old Man Emu struts, which are a common swap, and I’m suspicious of Quickstruts or cheap alternatives, but you can save a little dough if that doesn’t bug you.
Here’s what I had delivered:
- Upper and lower ball joints (4 per car)
- Lower control arms (bushings were shot; if equipped with a press, you could just do the bushings)
- Inner tie rod ends
- Outer tie rod ends
- Struts
- Swaybar links
- Upper strut mounts (the originals were actually okay, but I replaced them anyway)
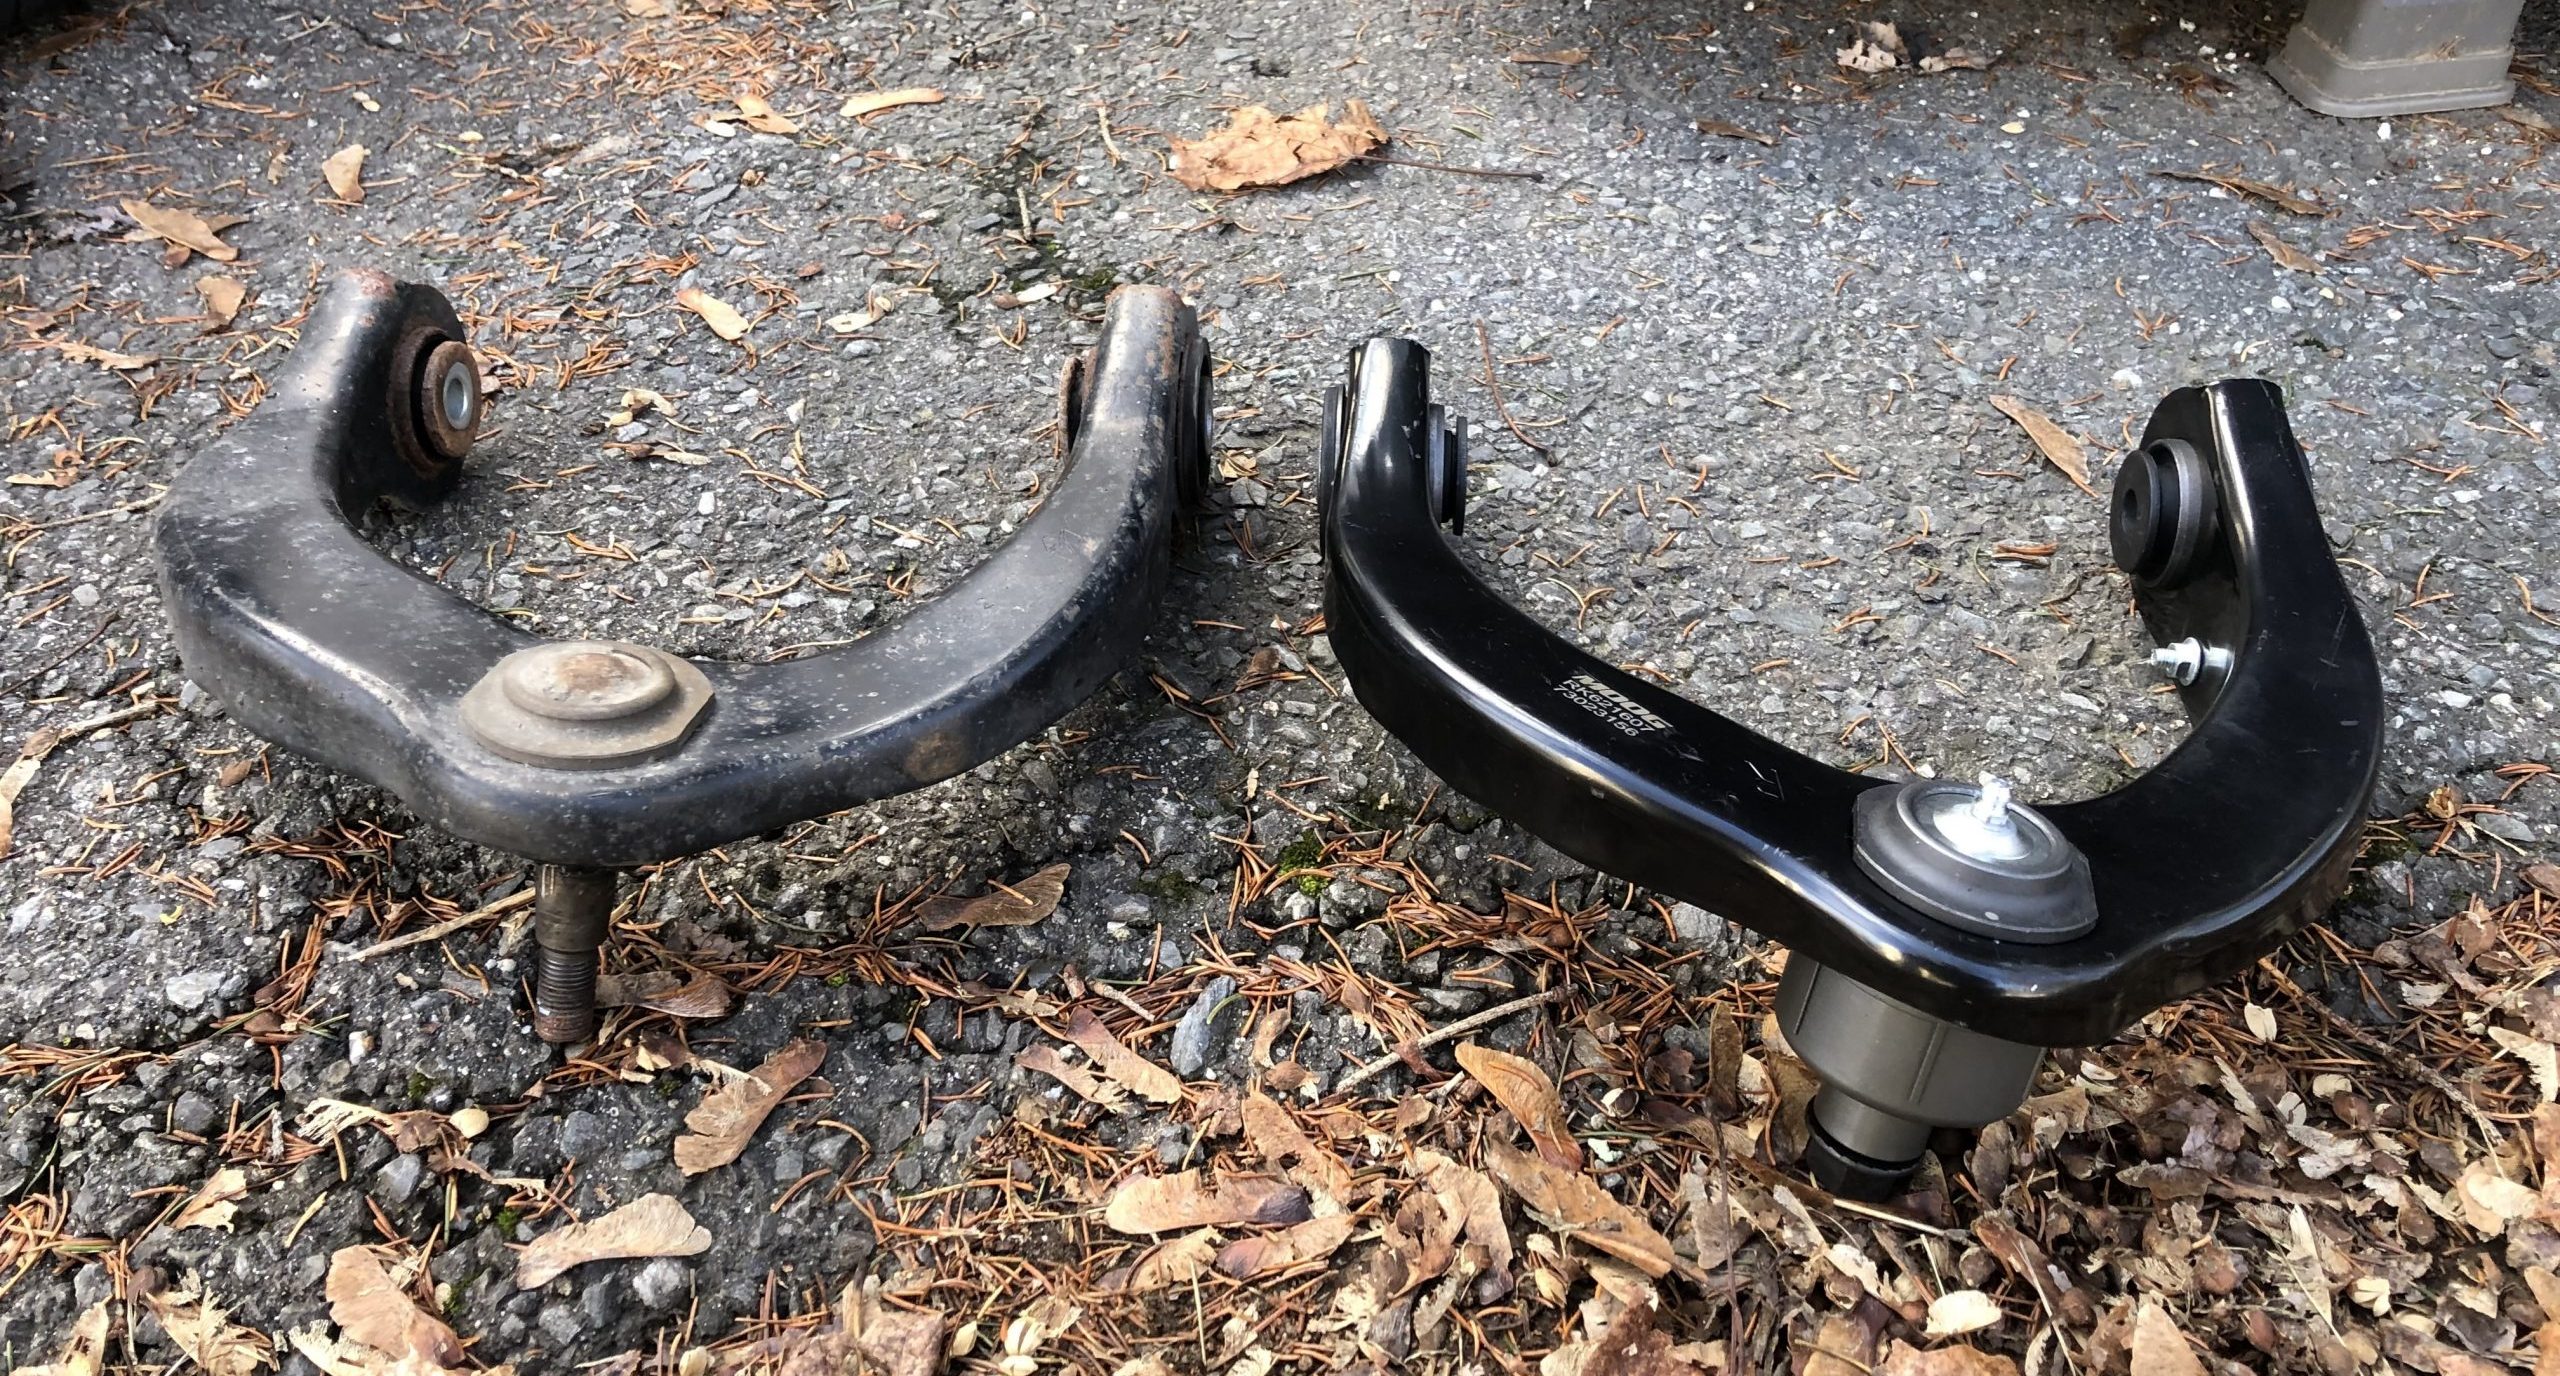
- One upper control arm (discovered that the bushings were shot during the repair, common)
I did not get wheel hubs, though I should have, as they later failed.
A note about parts:
As much as I like doing these kinds of jobs, it sucks to do it twice because you went with the absolute cheapest parts. Balljoints and swaybar links were from Moog with zerk fittings. Lower control arms were from Delphi. Tie rod ends were AC Delco Gold. Struts and upper strut mounts were genuine Mopar. All of the brands I used were not the least expensive, but I expect that that larger brands will have better quality, or at least a throat to choke if I need recompense. [Ed Note: I’m cheap, so I always use the least expensive parts I can find from a semi-reputable brand. It’s mostly worked out for me. Mostly. -DT].
And … a note about tools:
My brother in law is an awesome DIY mechanic with a penchant for tools, so I borrowed his electric impact wrench, balljoint press, and accessory kit. These were crucial. The impact has a lot of wallop, but it’s chonky boi. There’s nothing exotic here, you just need the right sizes.
You’ll also need a floor jack, wheel chocks and jackstands for this job. Get a good-quality spring compressor! If I could change one thing about how I did my job, it would be to find a used Branick spring compressor unit before starting. They’re around for a few hundred bucks. The WK2 has a LOT of spring. They’re tall and strong, and compressed springs are dangerous AF. I actually broke my spring compressor when the threads pulled out and it released all the tension with a “bang.” Code brown.
I ultimately got it done with a new clamshell-style spring compressor of the same style backed up with a couple of “death sticks.” I hated that part of the job, and it’s worth the cash to get the beefier pro tool. Sell it again once you’re done, if you’re inclined.
The Job Itself
I did one side at a time to minimize chaos. After getting the Jeep chocked and secured on jackstands, I removed the wheels.
Sticking a screwdriver in the circumferential brake rotor vents, and wedging it up against the brake caliper bracket to prevent the hub from spinning allowed me to loosen the axle nut. Having both front wheels high off the ground helped, because turning the wheels provides better access to the caliper bolts on the back side of the spindle. I wriggled the caliper assembly off and secured it out of the way. I’ve seen people let the calipers hang from the hose. That’s potentially damaging to the hose, and frankly sloppy. Don’t do that. Get some zip ties.
The impact is really handy to remove the nuts on the tie rod ends and ball joints. It can be hard to remove the nut from a balljoint that’s been in service for a while if you’re doing it by hand, because there aren’t always flats to place a wrench for counterholding. I slid the axle out of the hub with a combination of steering angle and swearing. It’s a little tricky because it only compresses/plunges so much.
I started at the upper balljoint with a pickle fork (u-shaped too with a ramped profile to release balljoint studs from their taper-fit mounting holes.) You could also use a balljoint separator (a tool that attaches and forces the balljoint apart by driving a screw against the end of the balljoint stud to push it out) if you wanted to get it apart but didn’t need to replace the balljoint, they’re kind of a slow pain to use. Even just a couple of hammer shots against the upright with the joint still under tension will pop it loose without damaging the dust boot on the balljoint.
I was worried about the ABS sensors, so I took my time with them. During a previous repair, I had broken the driver’s side ABS sensor and its harness connector, and I didn’t want to do that again. Since my WK2 has seen winter, that thing was fused in there with corrosion, and there was nothing I could do about it. On the passenger side, I gingerly released the connector that’s in the wheel well and removed the pigtail from all its rubber-isolated mounting points, leaving the sensor in the spindle assembly for the rest of the job. You have to be careful with the factory connectors; there’s a red tab you pull back to release, but be gentle or you’ll break it. There are replacements available from the big chain parts stores if you do; you’ll just have to splice it in.
The pickle fork made quick work of the outer tie rod end. Free from all the balljoints and steering, I placed the spindle off to the side. Try not to bend up the backing plate for the brake rotor. I gave the hubs an exploratory spin, and both were stiff and notchy, so I will have to go back and replace those, an un-fun job.
With the spindle out of the way, there’s a little more room to work. The strut assembly was next. It attaches to the lower control arm with one large through-bolt that the electric impact shrugged off. I had to drive these bolts out of the lower arm with a drift. Putting the floor jack under the control arm and raising it just enough to take the load off the bolt made that easier.
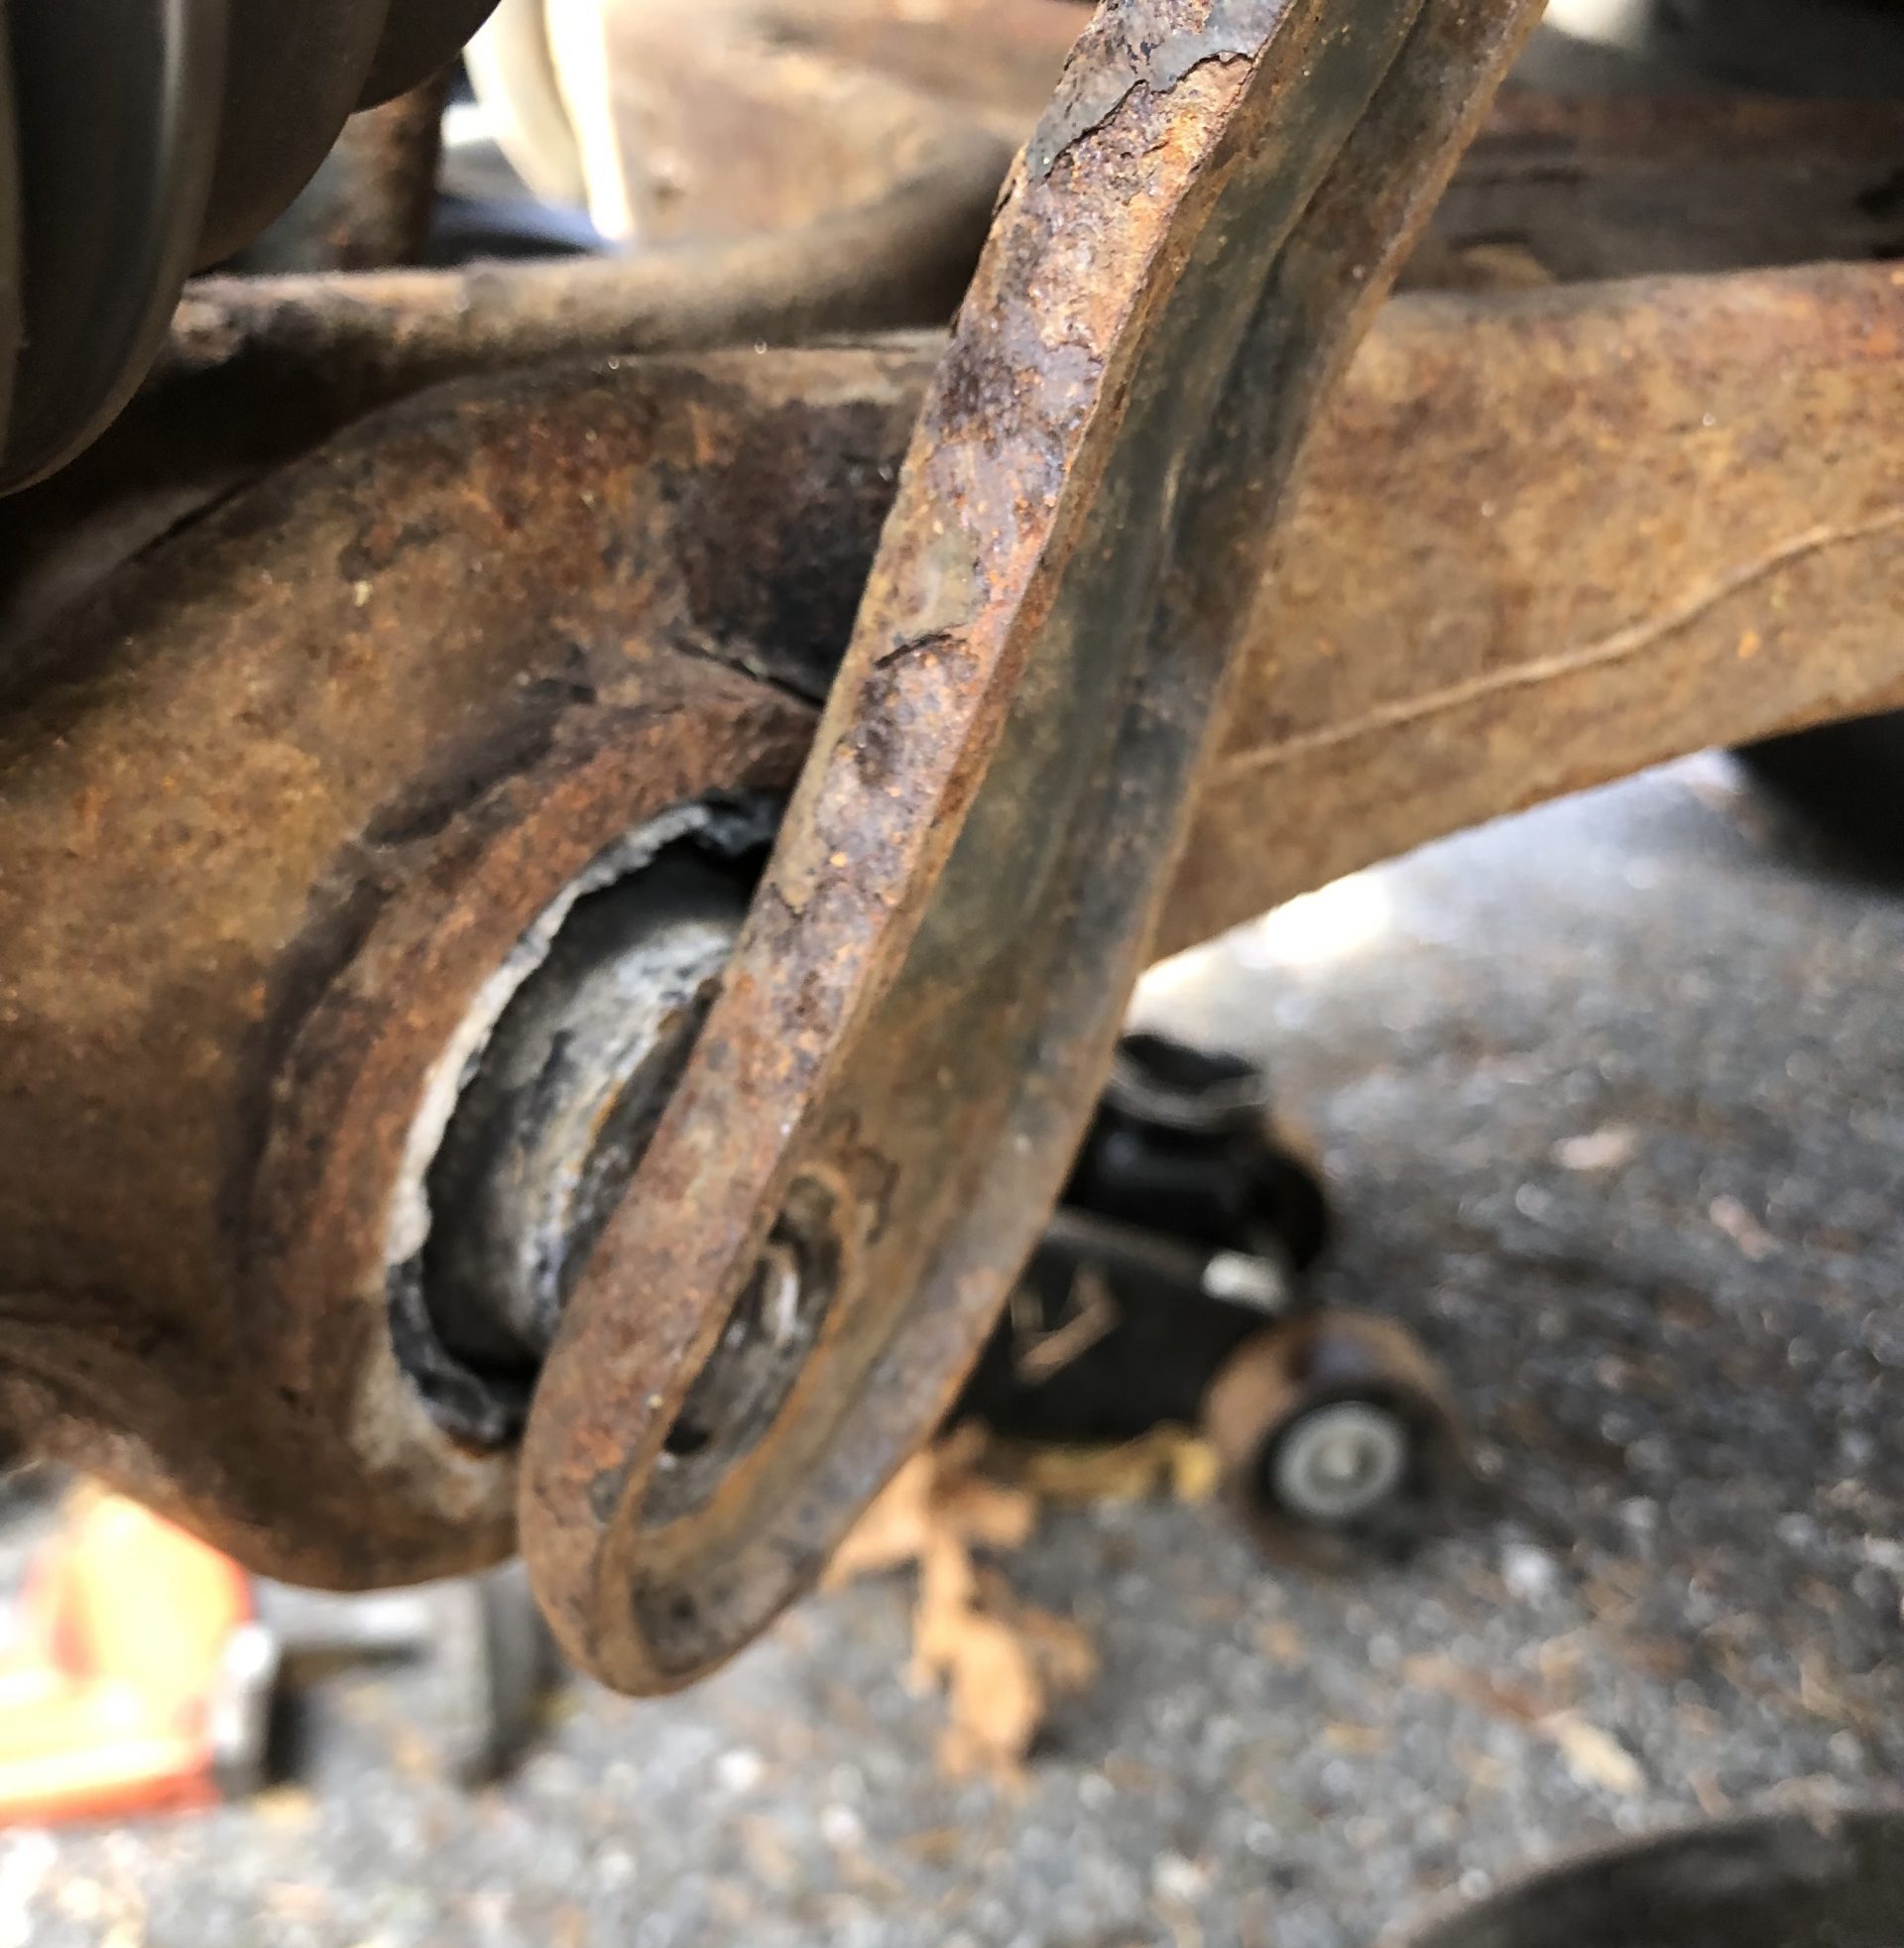
At the top of the strut towers, in the engine compartment, I loosened the upper strut nut under the black plastic cap, but didn’t remove it just yet. It’s easier to loosen this way. Then I removed the three nuts that hold the assembly into the strut tower and lowered it out. Sounds easy now. Took swearing then. Things have to flex around a disconcerting amount to get the strut clear of the drive axle and the lower control arm. This might have been the point in the job where I removed the axle from the front differential. That pops out by getting the pickle fork behind it and giving the handle a sharp jolt. I wound up in a death match with the swaybar links until I mashed the old Vise Grips on the stud to hold it in place from spinning.
The Rust Was Rough, So I Broke Out The Torch
When things get ornery, never underestimate the power of heat. I had a MAPP gas torch handy and melted the centers out of a couple Nylock nuts that needed to be tortured into cooperation. Quenching with penetrating oil (you probably have feelings about your favorite flavor. That’s cool) can help release the bonds of rust.
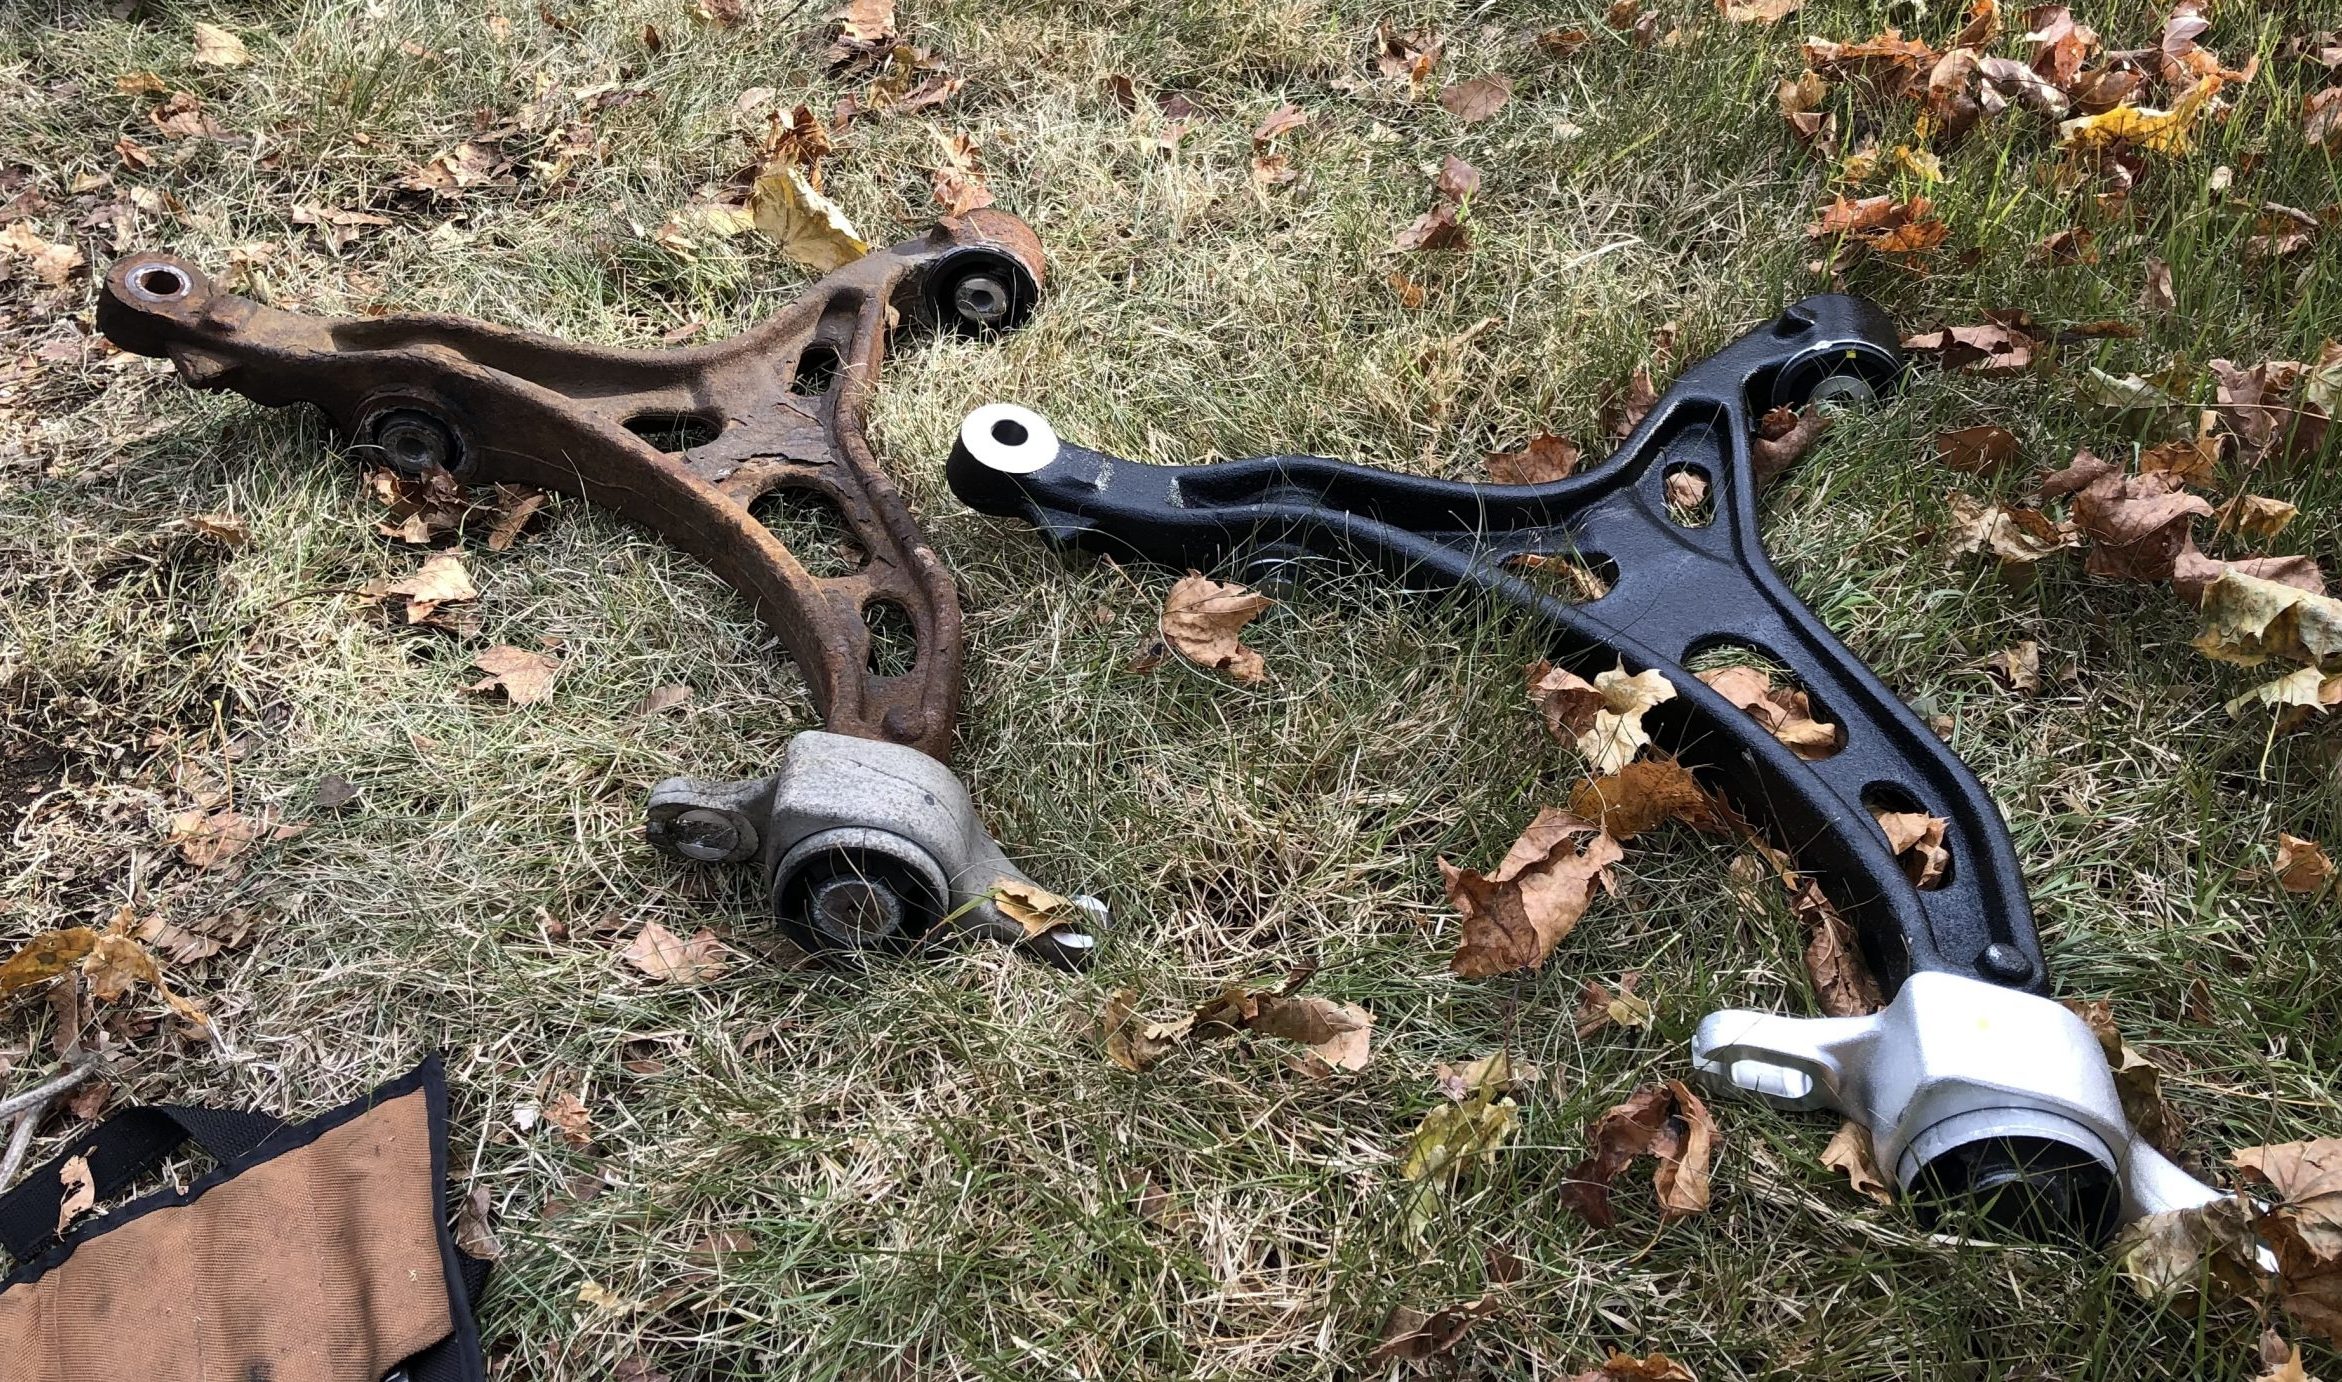
The lower control arm itself is simply a matter of getting after it with the right size sockets and wrenches. Dropping the drip pan below the engine helped get a socket/impact combo on the control arm’s front bolt. There are two rear bolts, one horizontally oriented in a slotted opening that allows for alignment adjustment, and one vertically oriented. Even if you’re replacing control arms, like I did, it’s a good idea to mark the position of these bolt heads with a Sharpie or paint marker (like I didn’t). It will help you ballpark the alignment during reassembly. You’ll just have to transfer the marks manually from the old arms to the new ones.
These things are heavy, and they fit snugly in their mounting locations. I used a piece of 2×4 and a 2.5-pound hammer to provide encouragement for removal. Now I had all the big stuff apart.
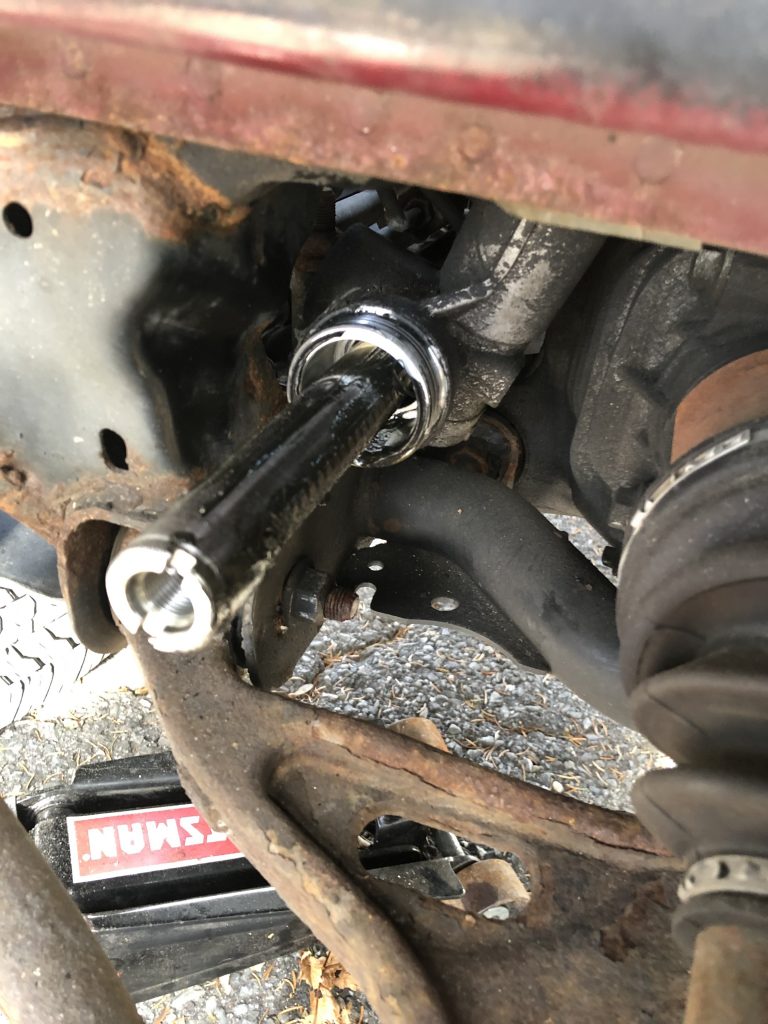
To remove the tie rods, I turned the steering to full-lock for the side being worked on and removed destroyed the Oetiker clamp holding the rubber bellows to the rack body. There are apparently tools for those things, but it appears you’ll need a separate tool for removal and installation. With the boot released, I was able to fold it back and get a pipe wrench on the inner tie rod end and loosen it. I had wanted to leave the tie rod assemblies intact so I’d just have to match their lengths with the new stuff during reassembly to get to that ballpark alignment, but to get the boots off the inner tie rod end, I had to remove the outers. I marked the location of the locknut, but one of these was really stuck. My brother in law’s tool stash helped again with a “miniductor” to heat it significantly so it would come off. Unfortunately, metal conducts heat, and intense heat melts steering boots.
Replacements weren’t easy to find; the one source I located for these was 1A Auto, who had them from EMPI of all brands! EMPI, you see, is a brand better known in the U.S. for its air cooled Volkswagen parts.
Front Struts…Assemble!
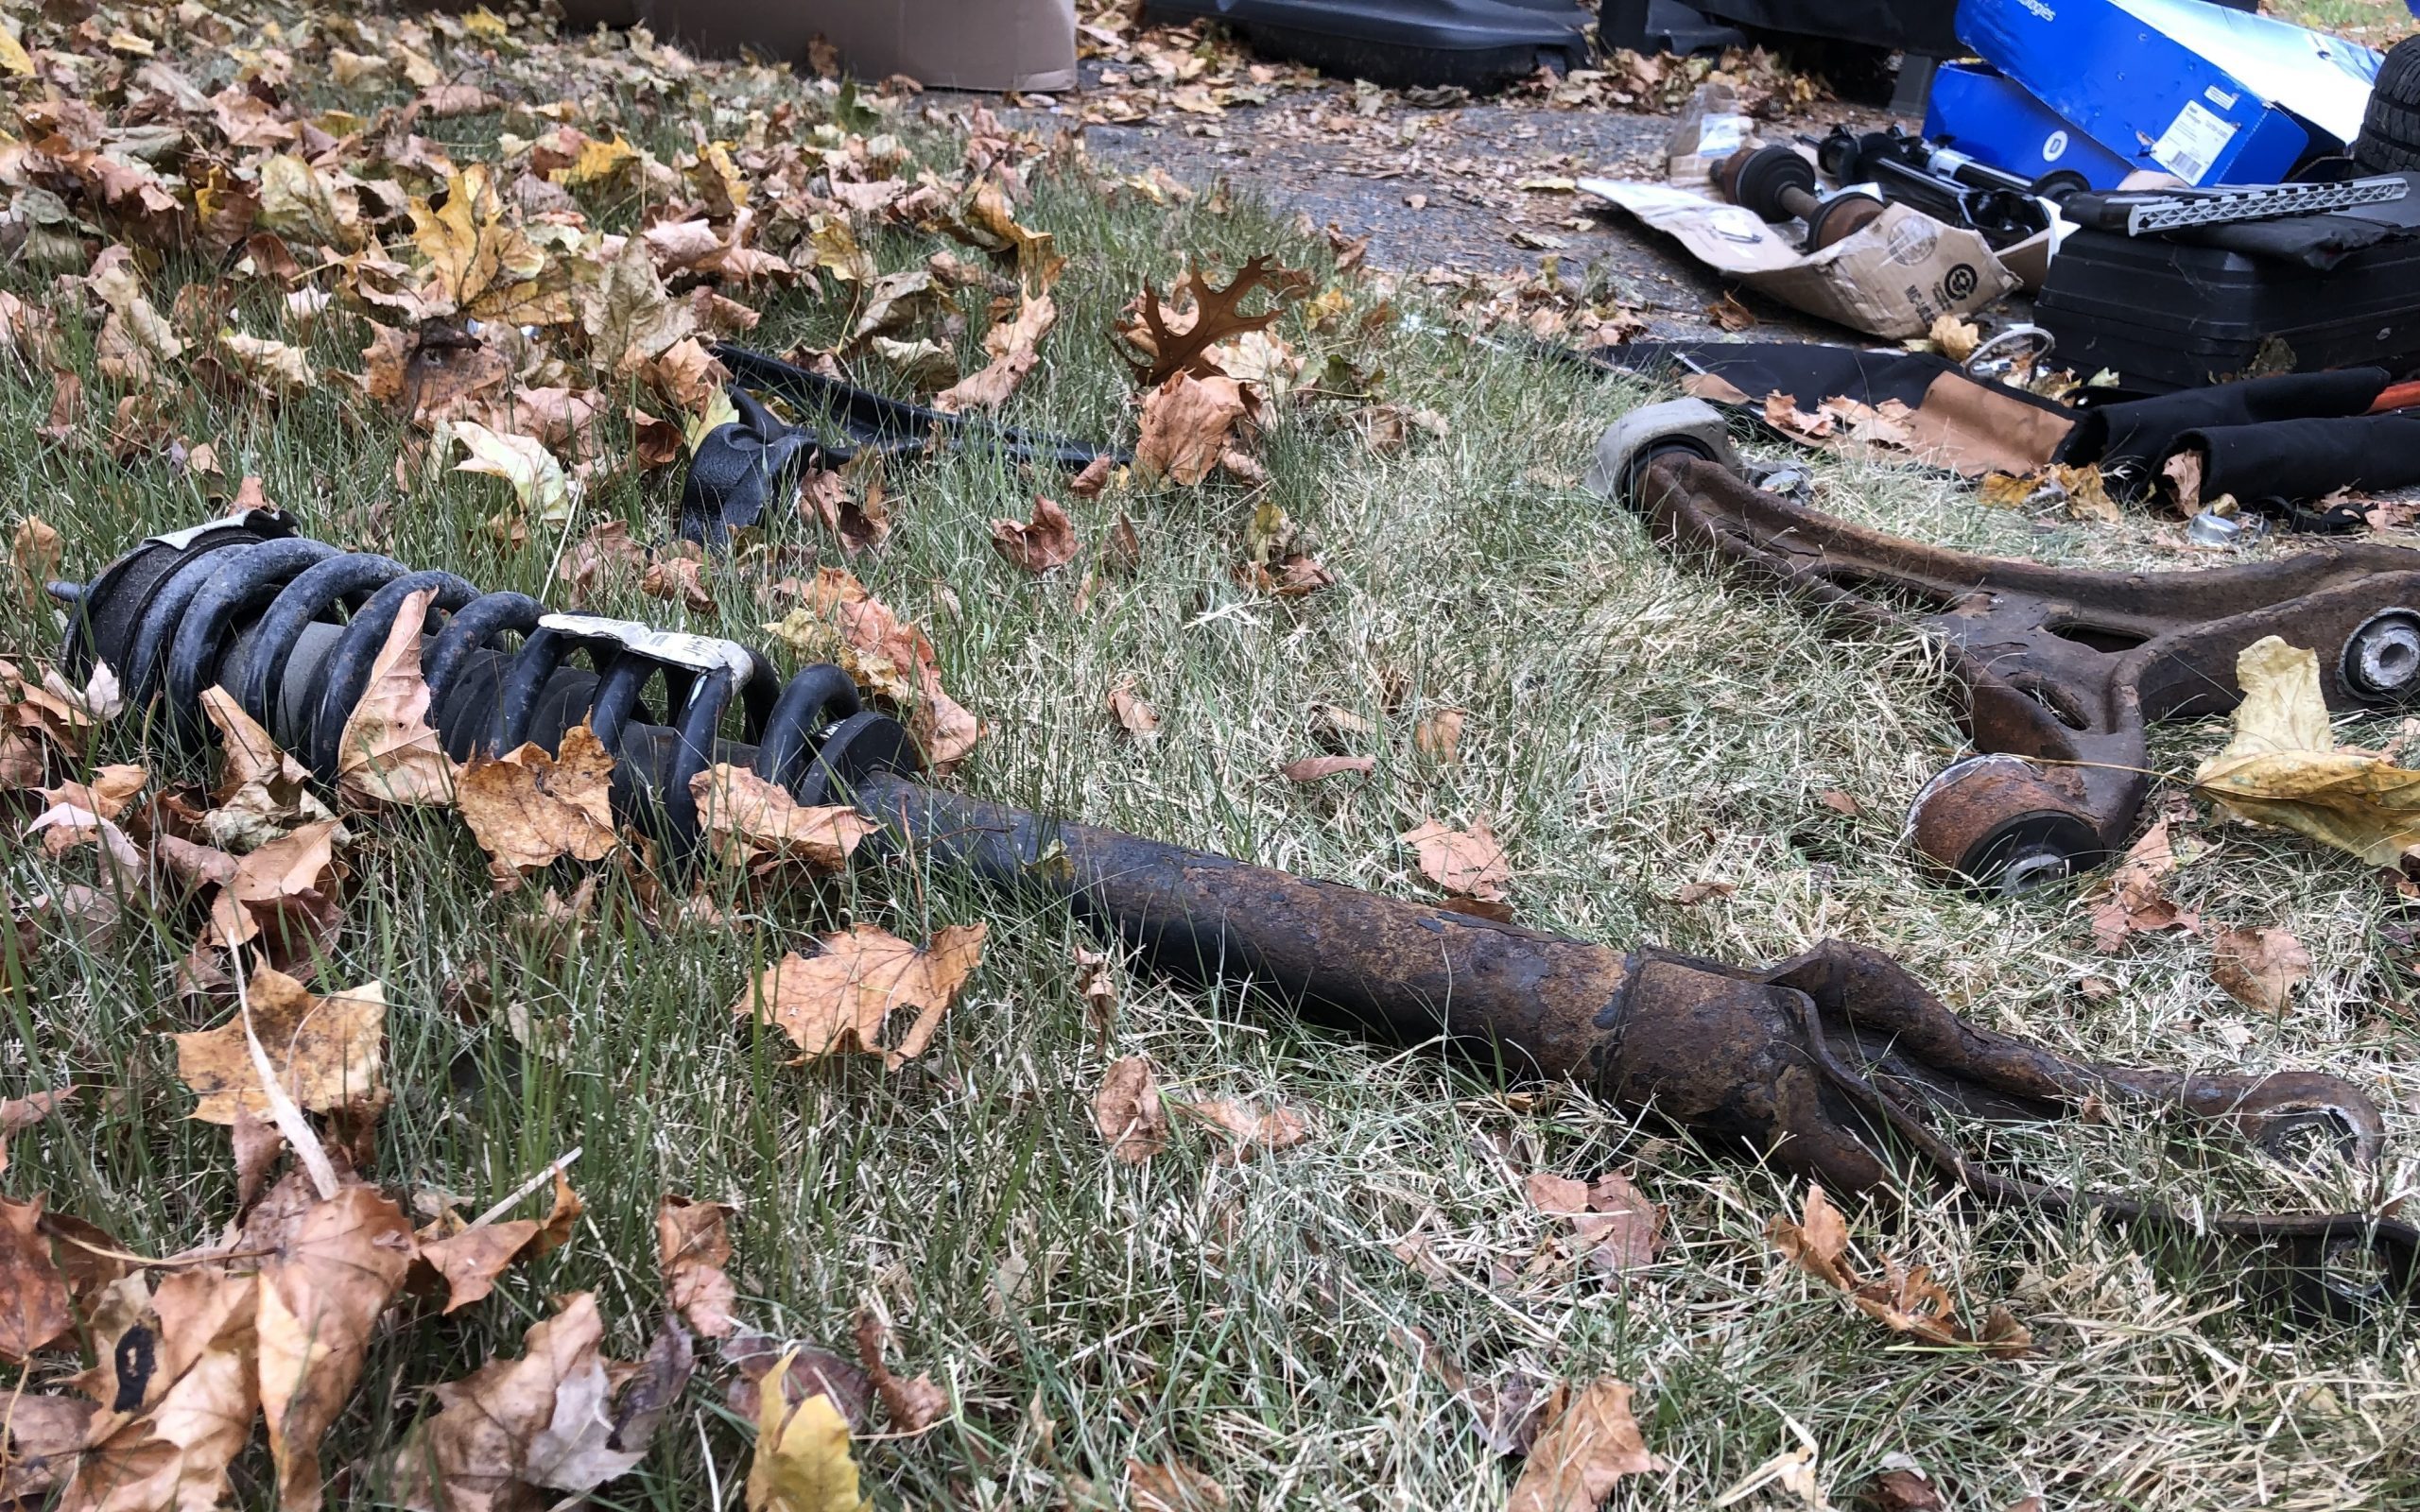
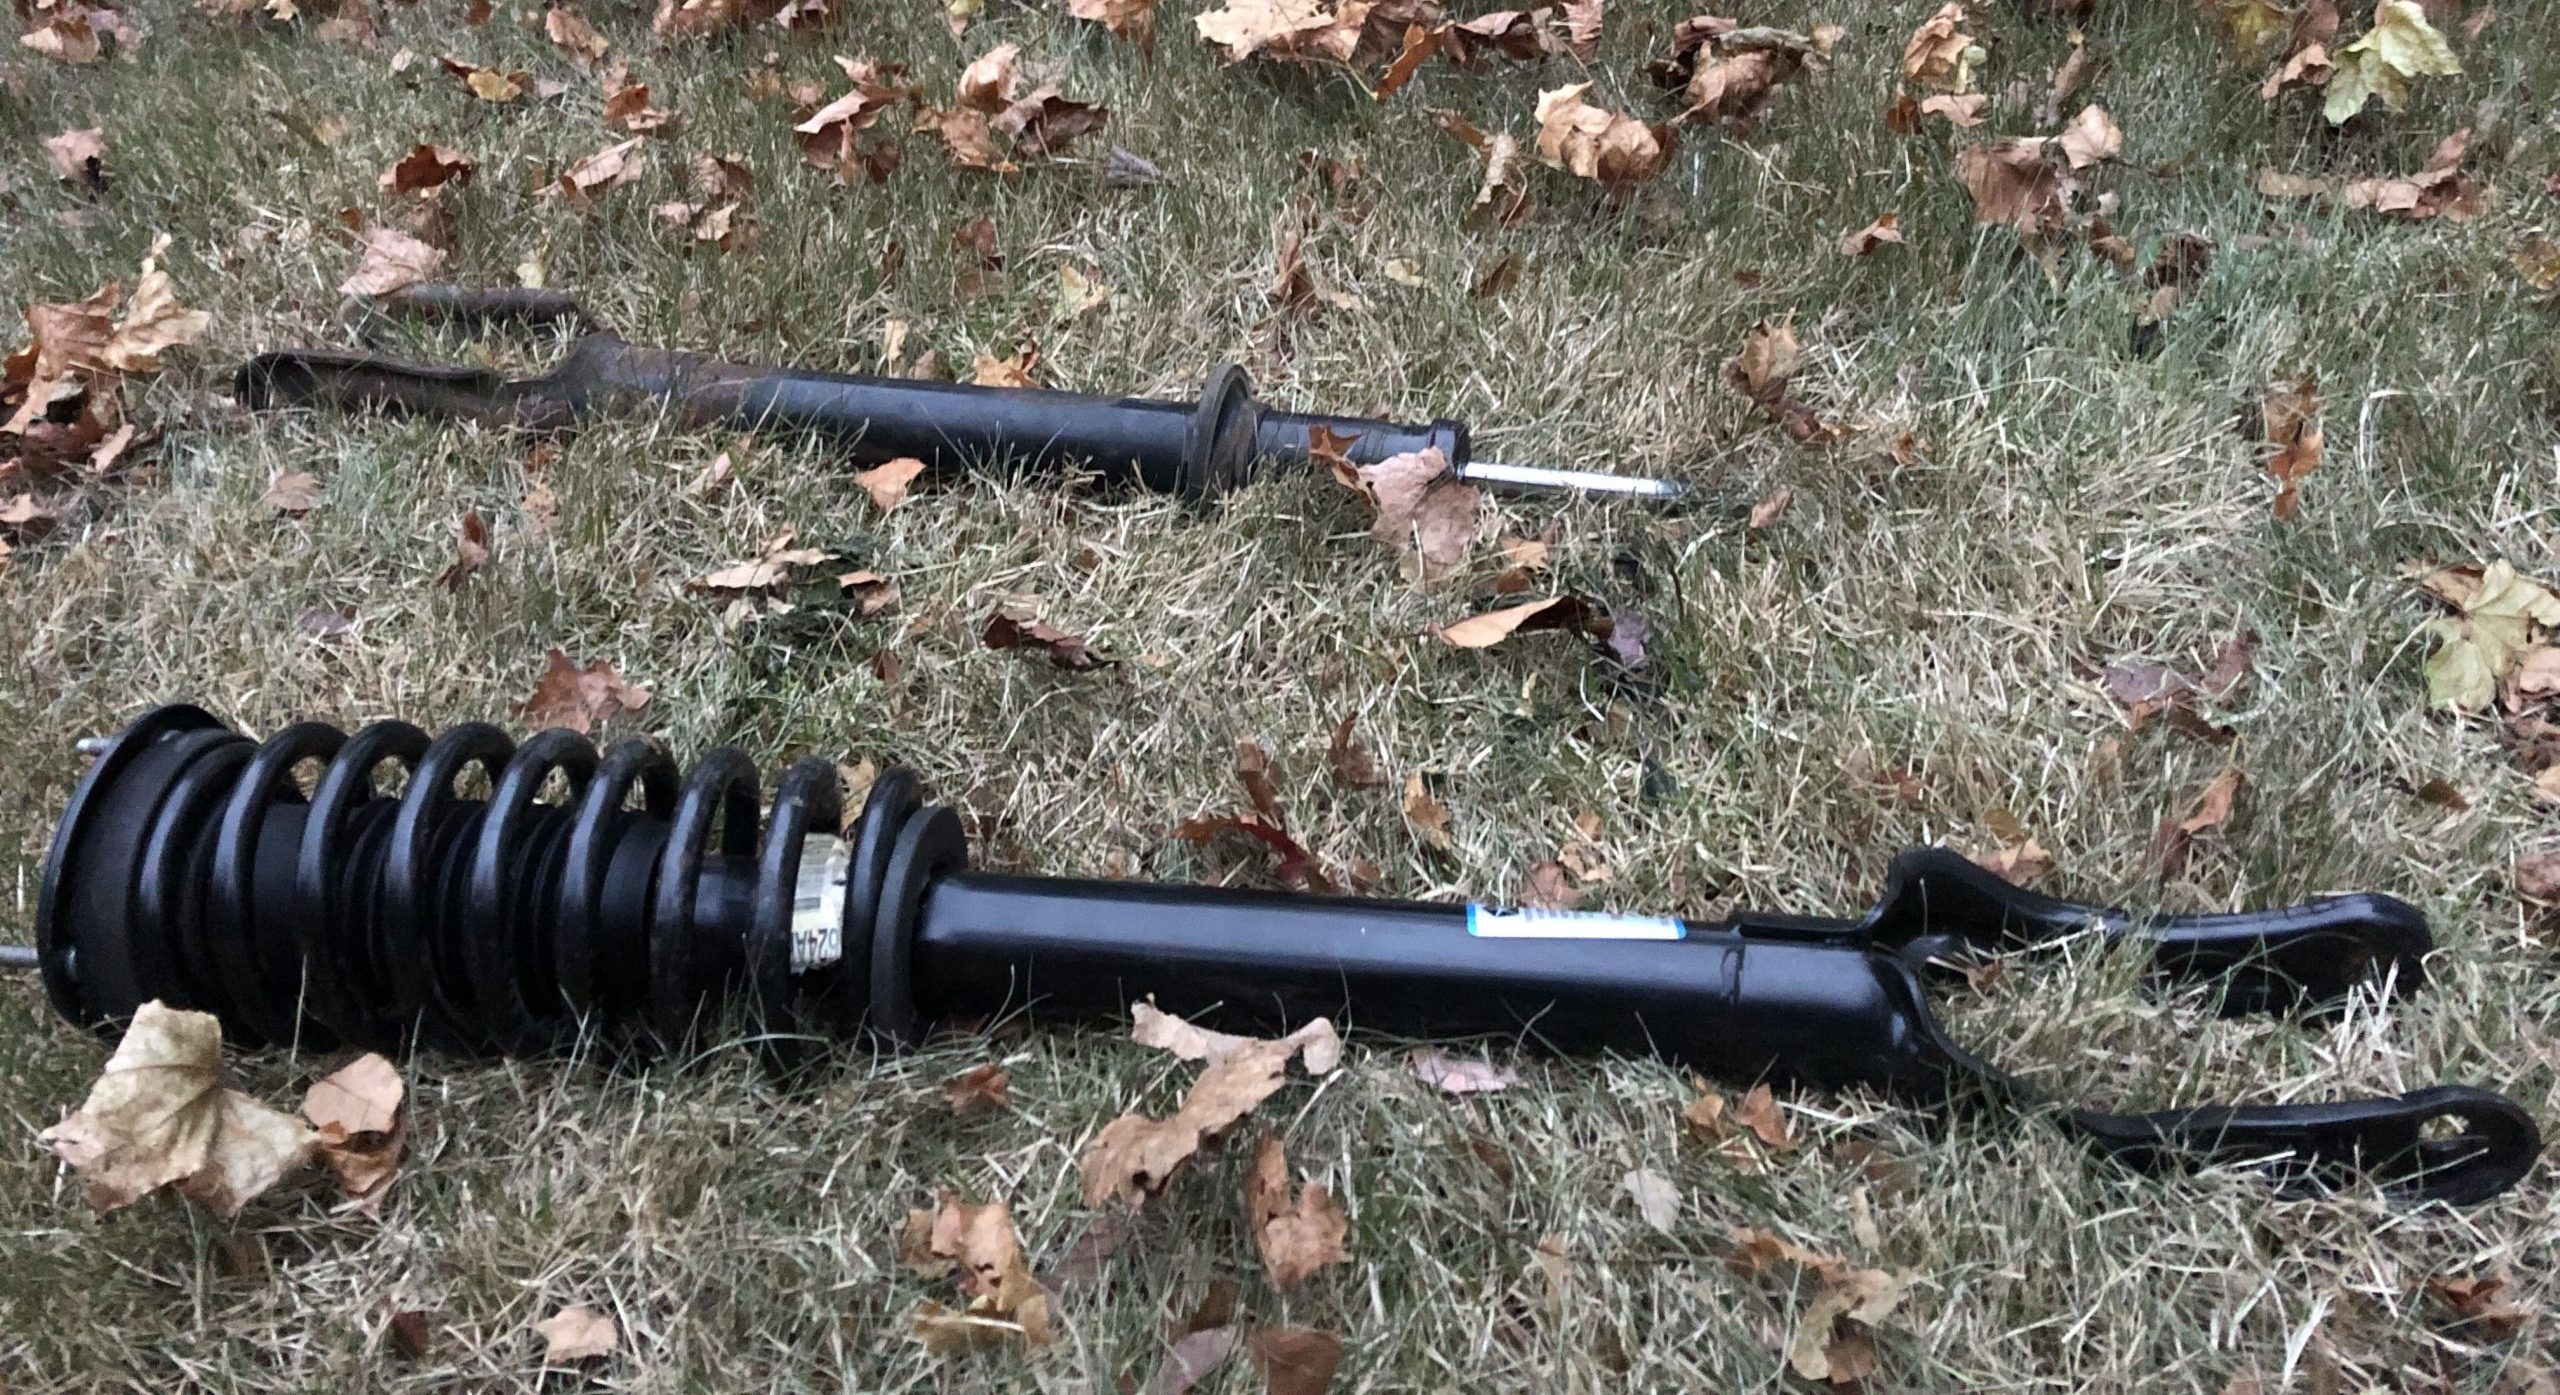
The old was out, so it was time to put the new in. I didn’t replace the springs, so I just had to swap them over from old to new struts. This meant the dreaded step of compressing the springs. [Ed Note: This is the beauty of quickstruts — it all comes assembled! -DT]. The way I did this, in grass of the backyard fumbling around with a combo of manual clamshell and individual hook-and-screw style compressors, really sucks.
Tips:
- You have to compress the spring a lot
- Make sure you grease the screws on the compressors
- Leverage helps, like a ratcheting breaker bar
- Position yourself to the side of the spring as much as possible to minimize getting hit if a sudden decompression happens
- The electric impact helped, but the amount of vibration could get things out of alignment, and it just felt gnarly.
I hate compressing springs. They’re basically live grenades.
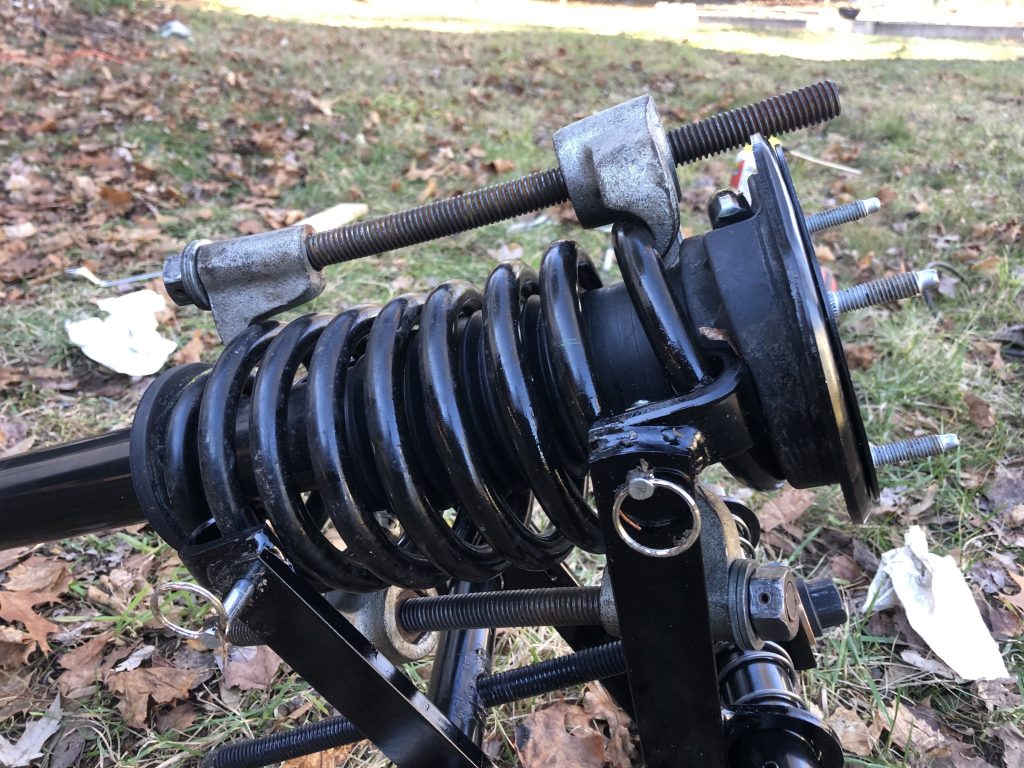
Getting the old springs on the new struts with the coil ends in the proper orientation took diligence. You also have to keep in mind how the upper mount studs are oriented in relation to the lower strut mount. Get it wrong, and things won’t point in the right direction once they’re back in the car.
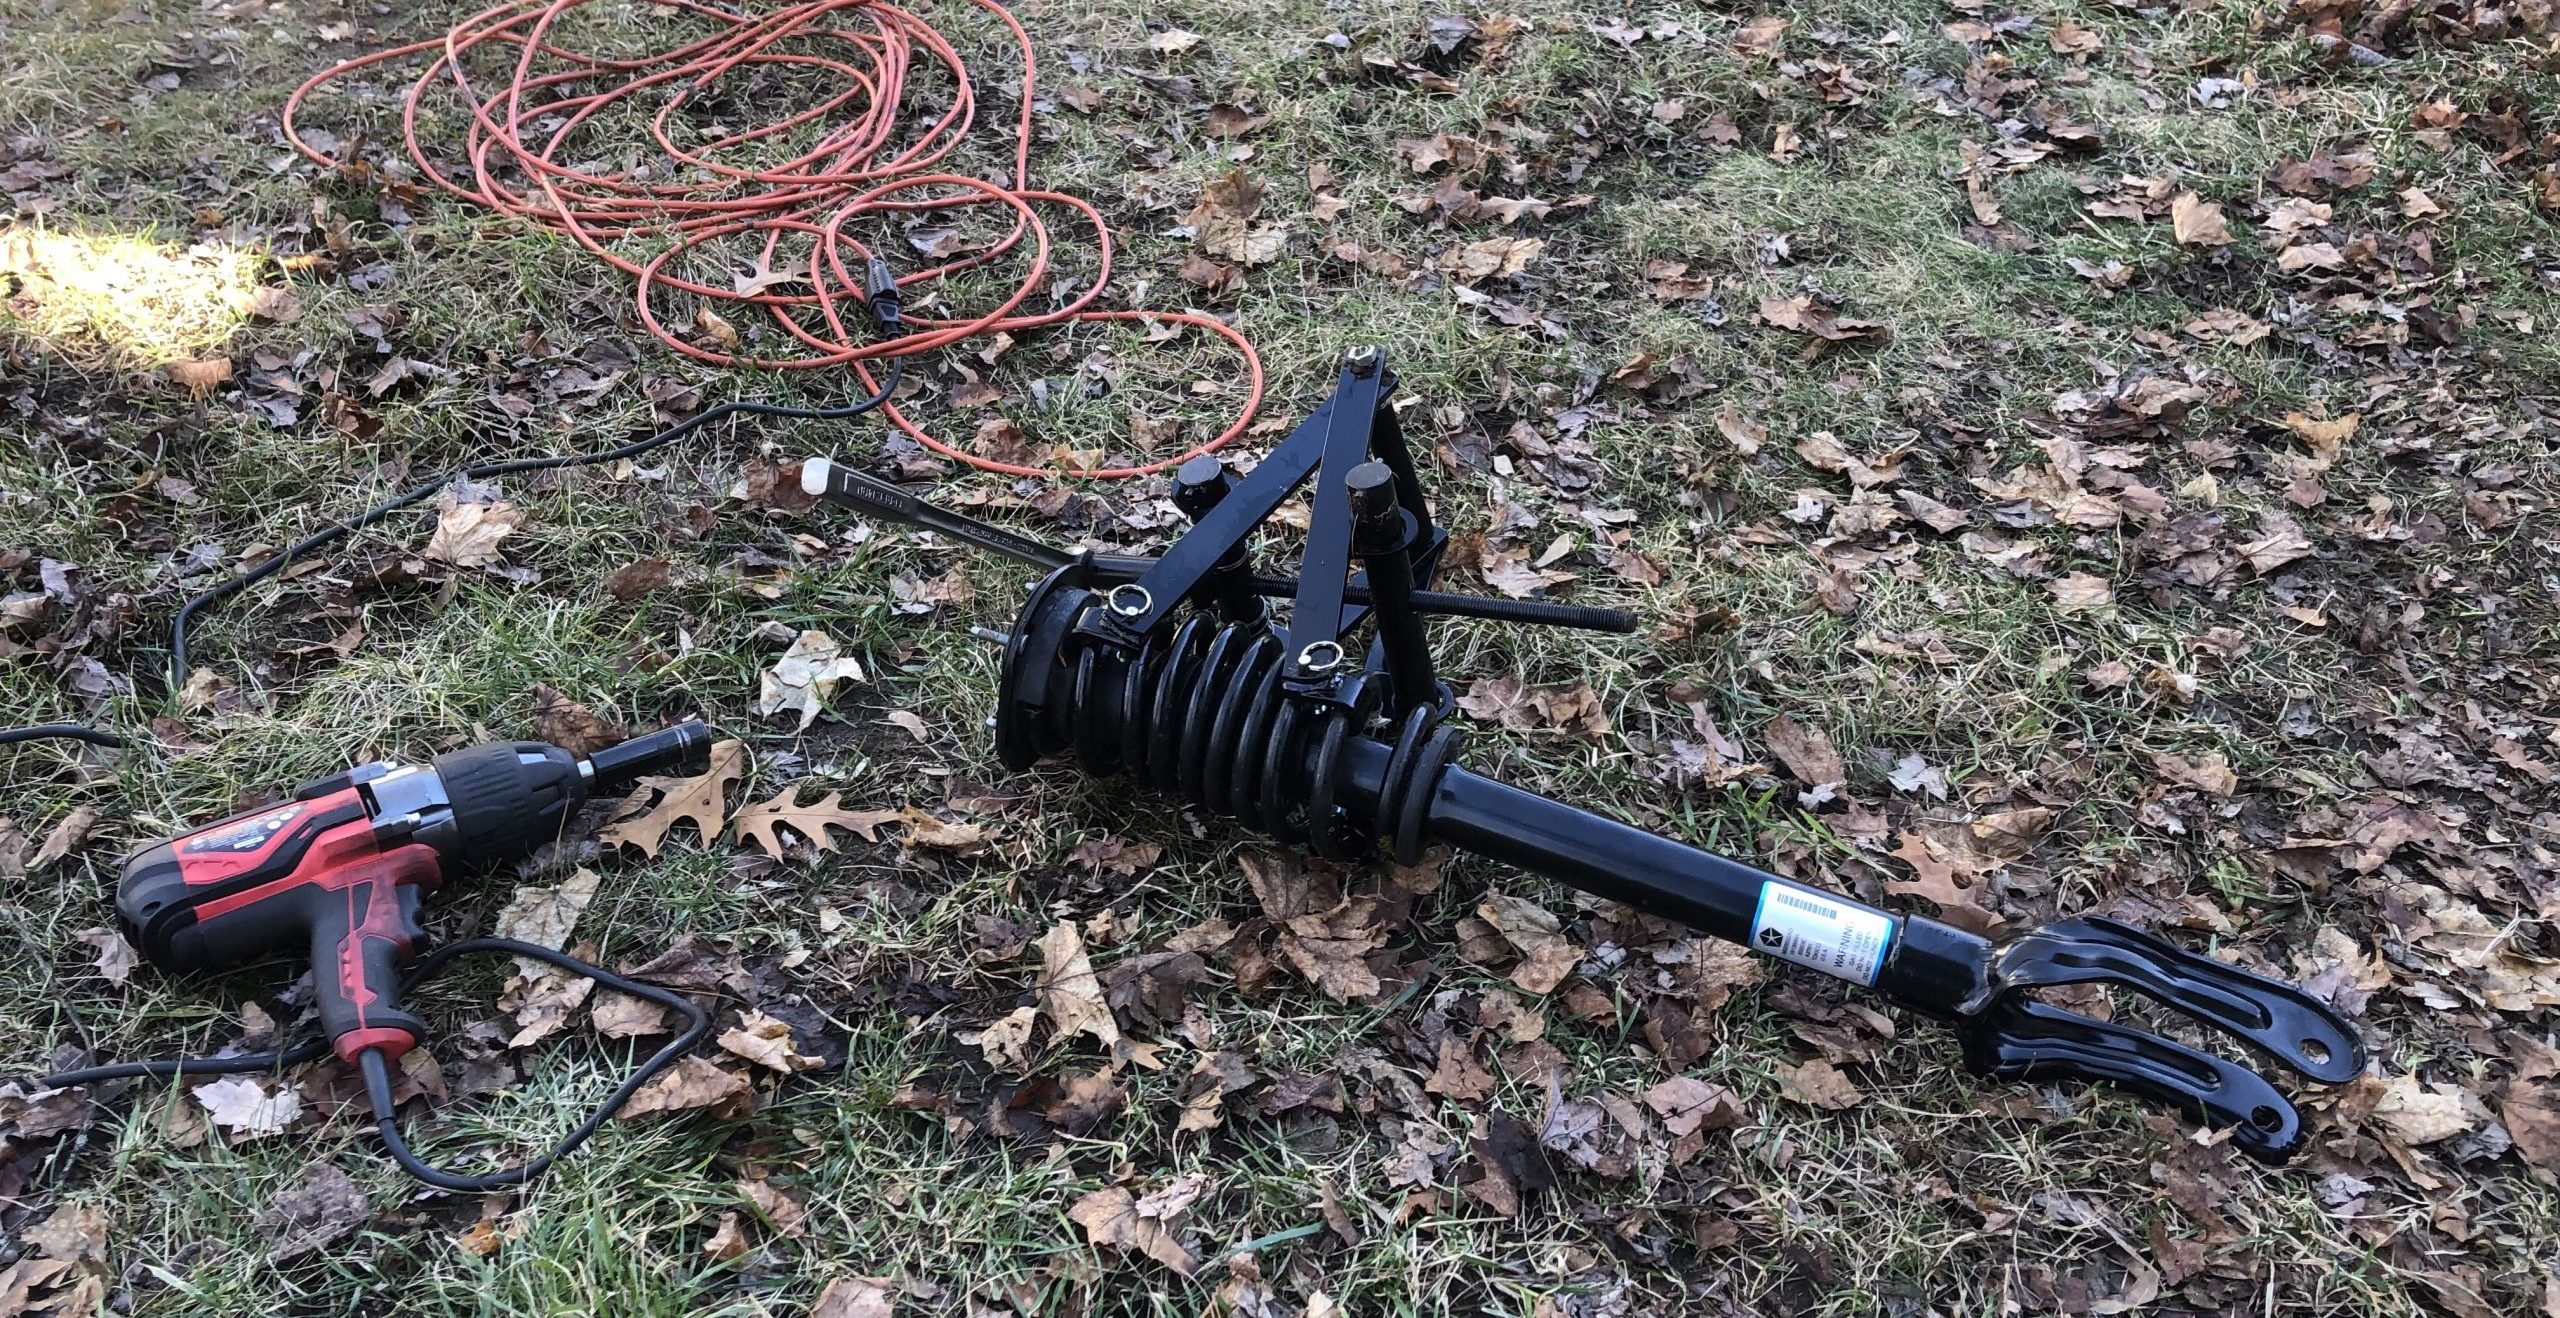
I breathed a little easier once I got the upper strut mount nut back on, and I hit it with the impact to tighten. Some say not to do this because the vibration might damage the internal valving of the shock, but I don’t think it’s any worse than what it has to deal with over a rough patch of pavement, and loose strut mounts rattle and knock so your car feels cheap and broken.
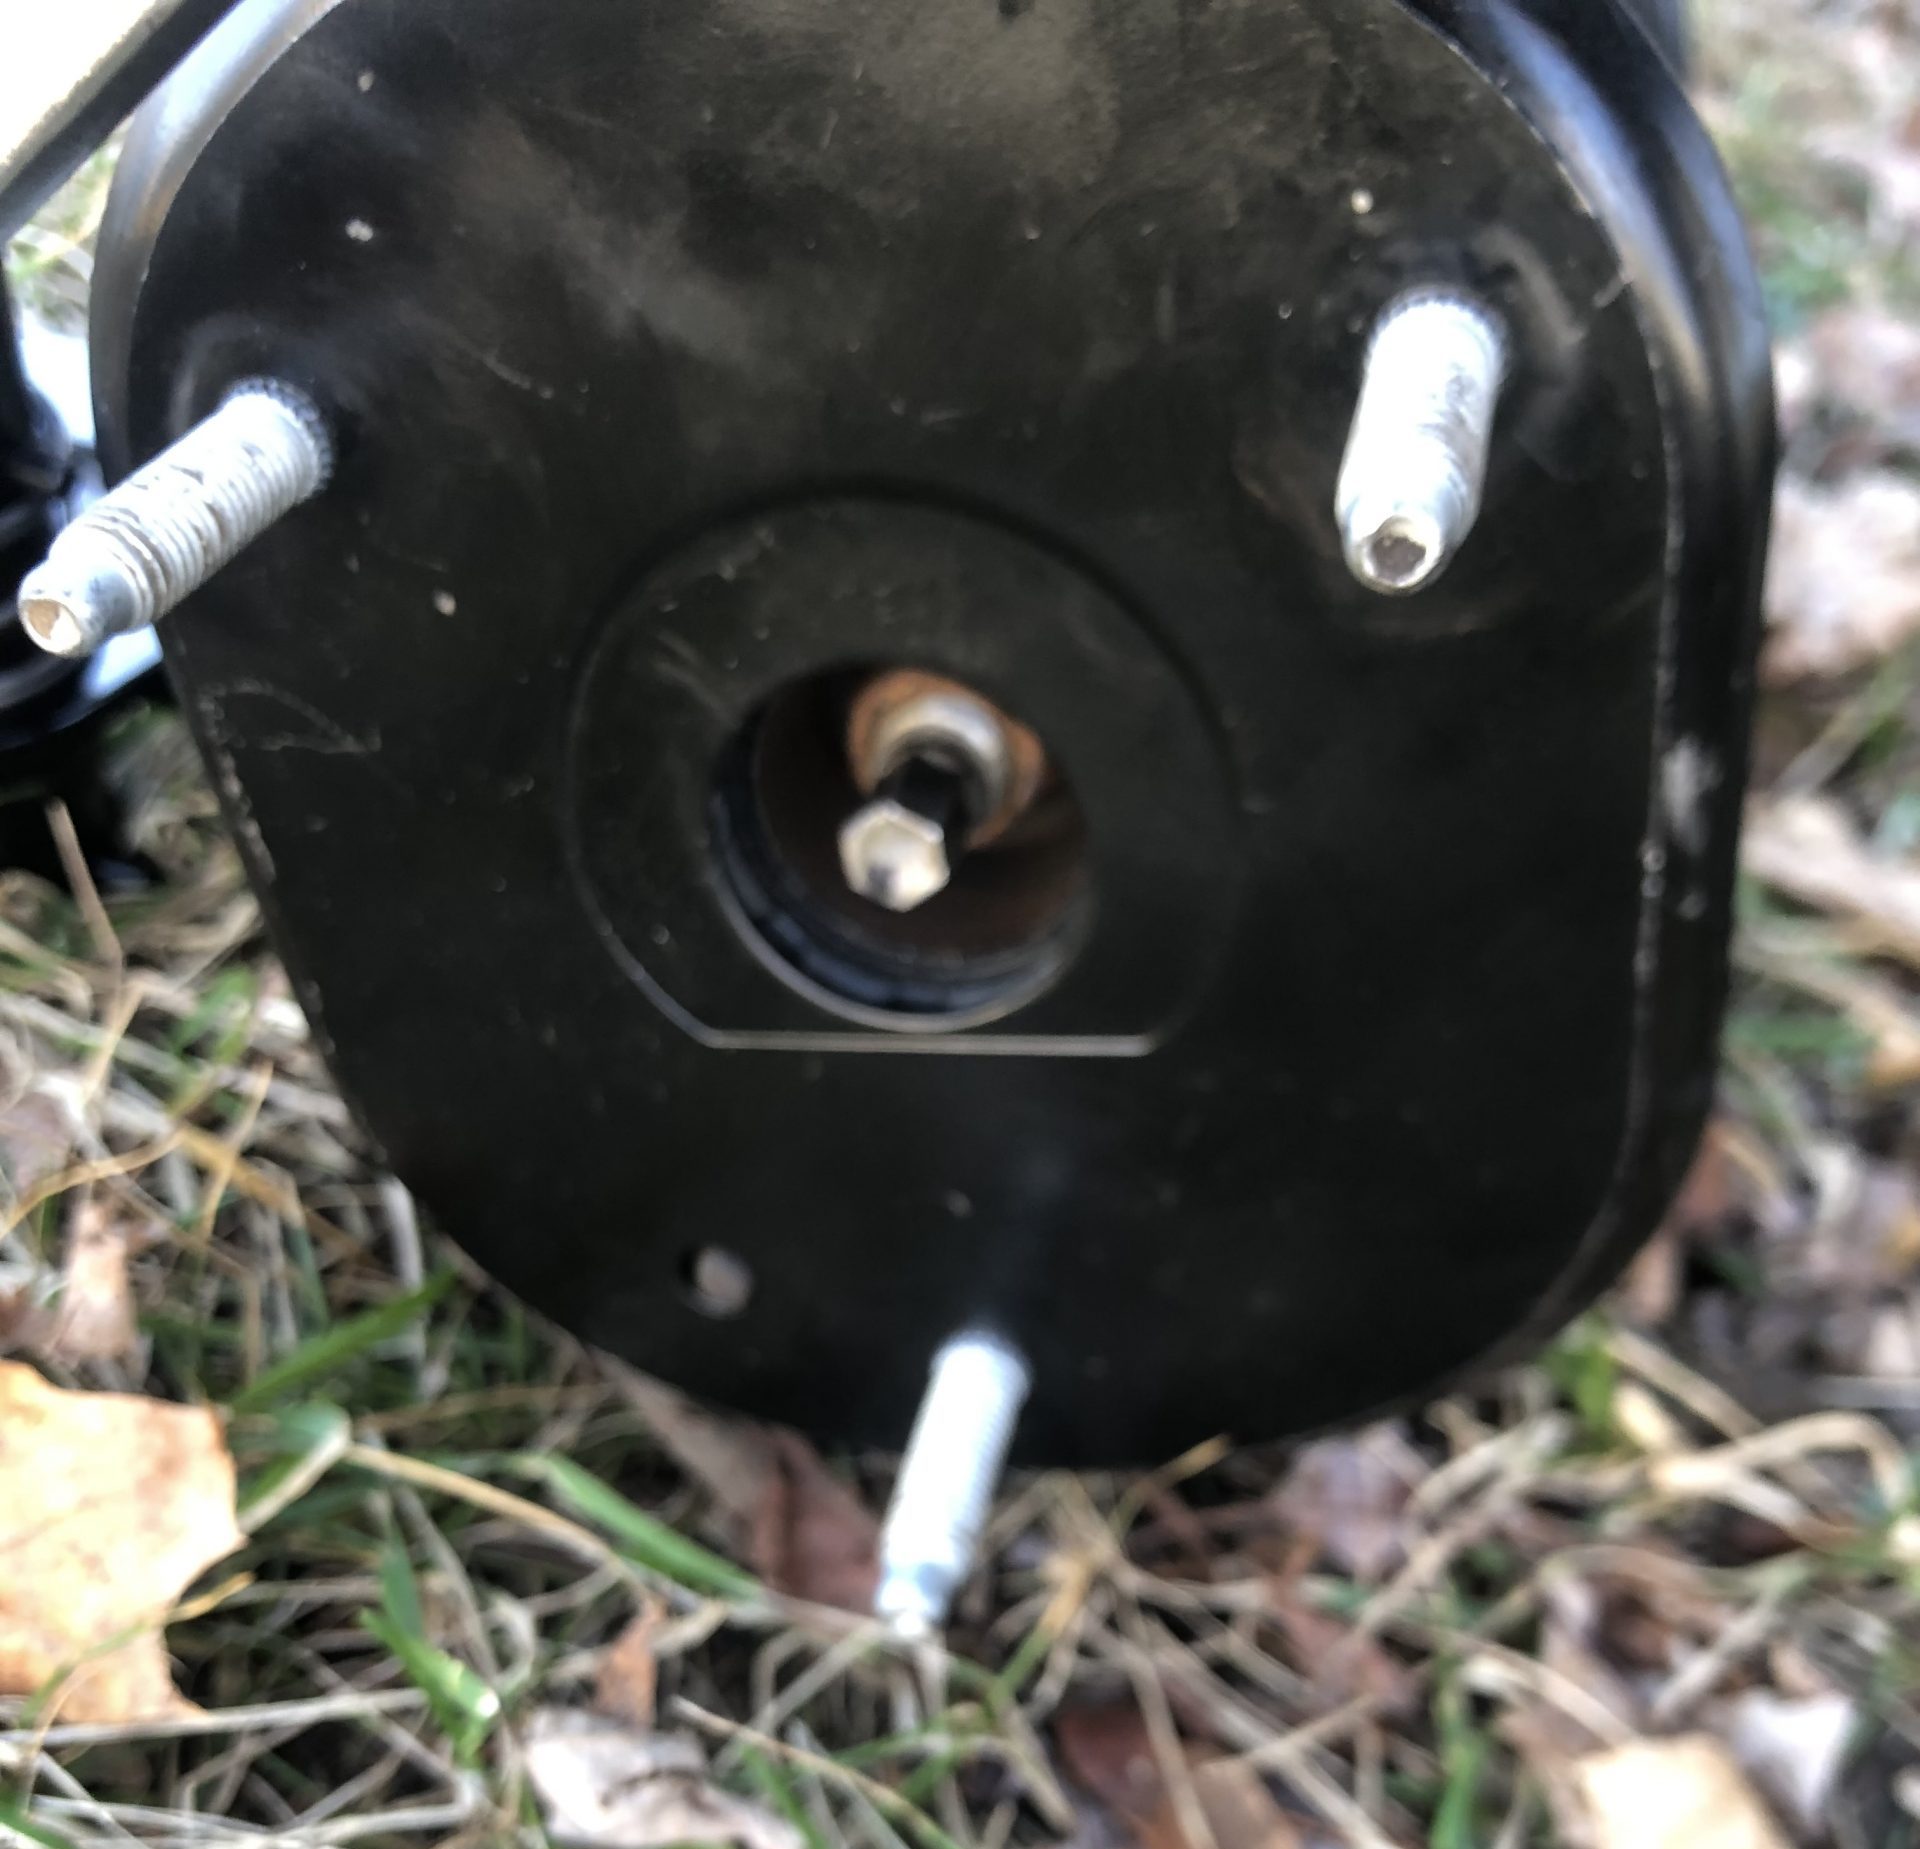
The final pain in the ass with the springs turned out to be getting the compressors off. The hooks got stuck under the rubber of the upper mount and had to be wrestled free.
Ball joints
Removing and replacing the ball joints is a significant subtask for this job. This was my first time using a ball joint press, which is like a large C-clamp that, together with the properly sized cup, pushes the press-fit balloint out. You position it on the joint with one of the cups, so that when you tighten the screw on the opposite side, it pushes the balljoint into the cup. The whole shebang flips around for installation, and I had to be careful to select the right-sized cup to engage with the body of the balljoint and drive it in straight. I didn’t want to bend or distort anything.
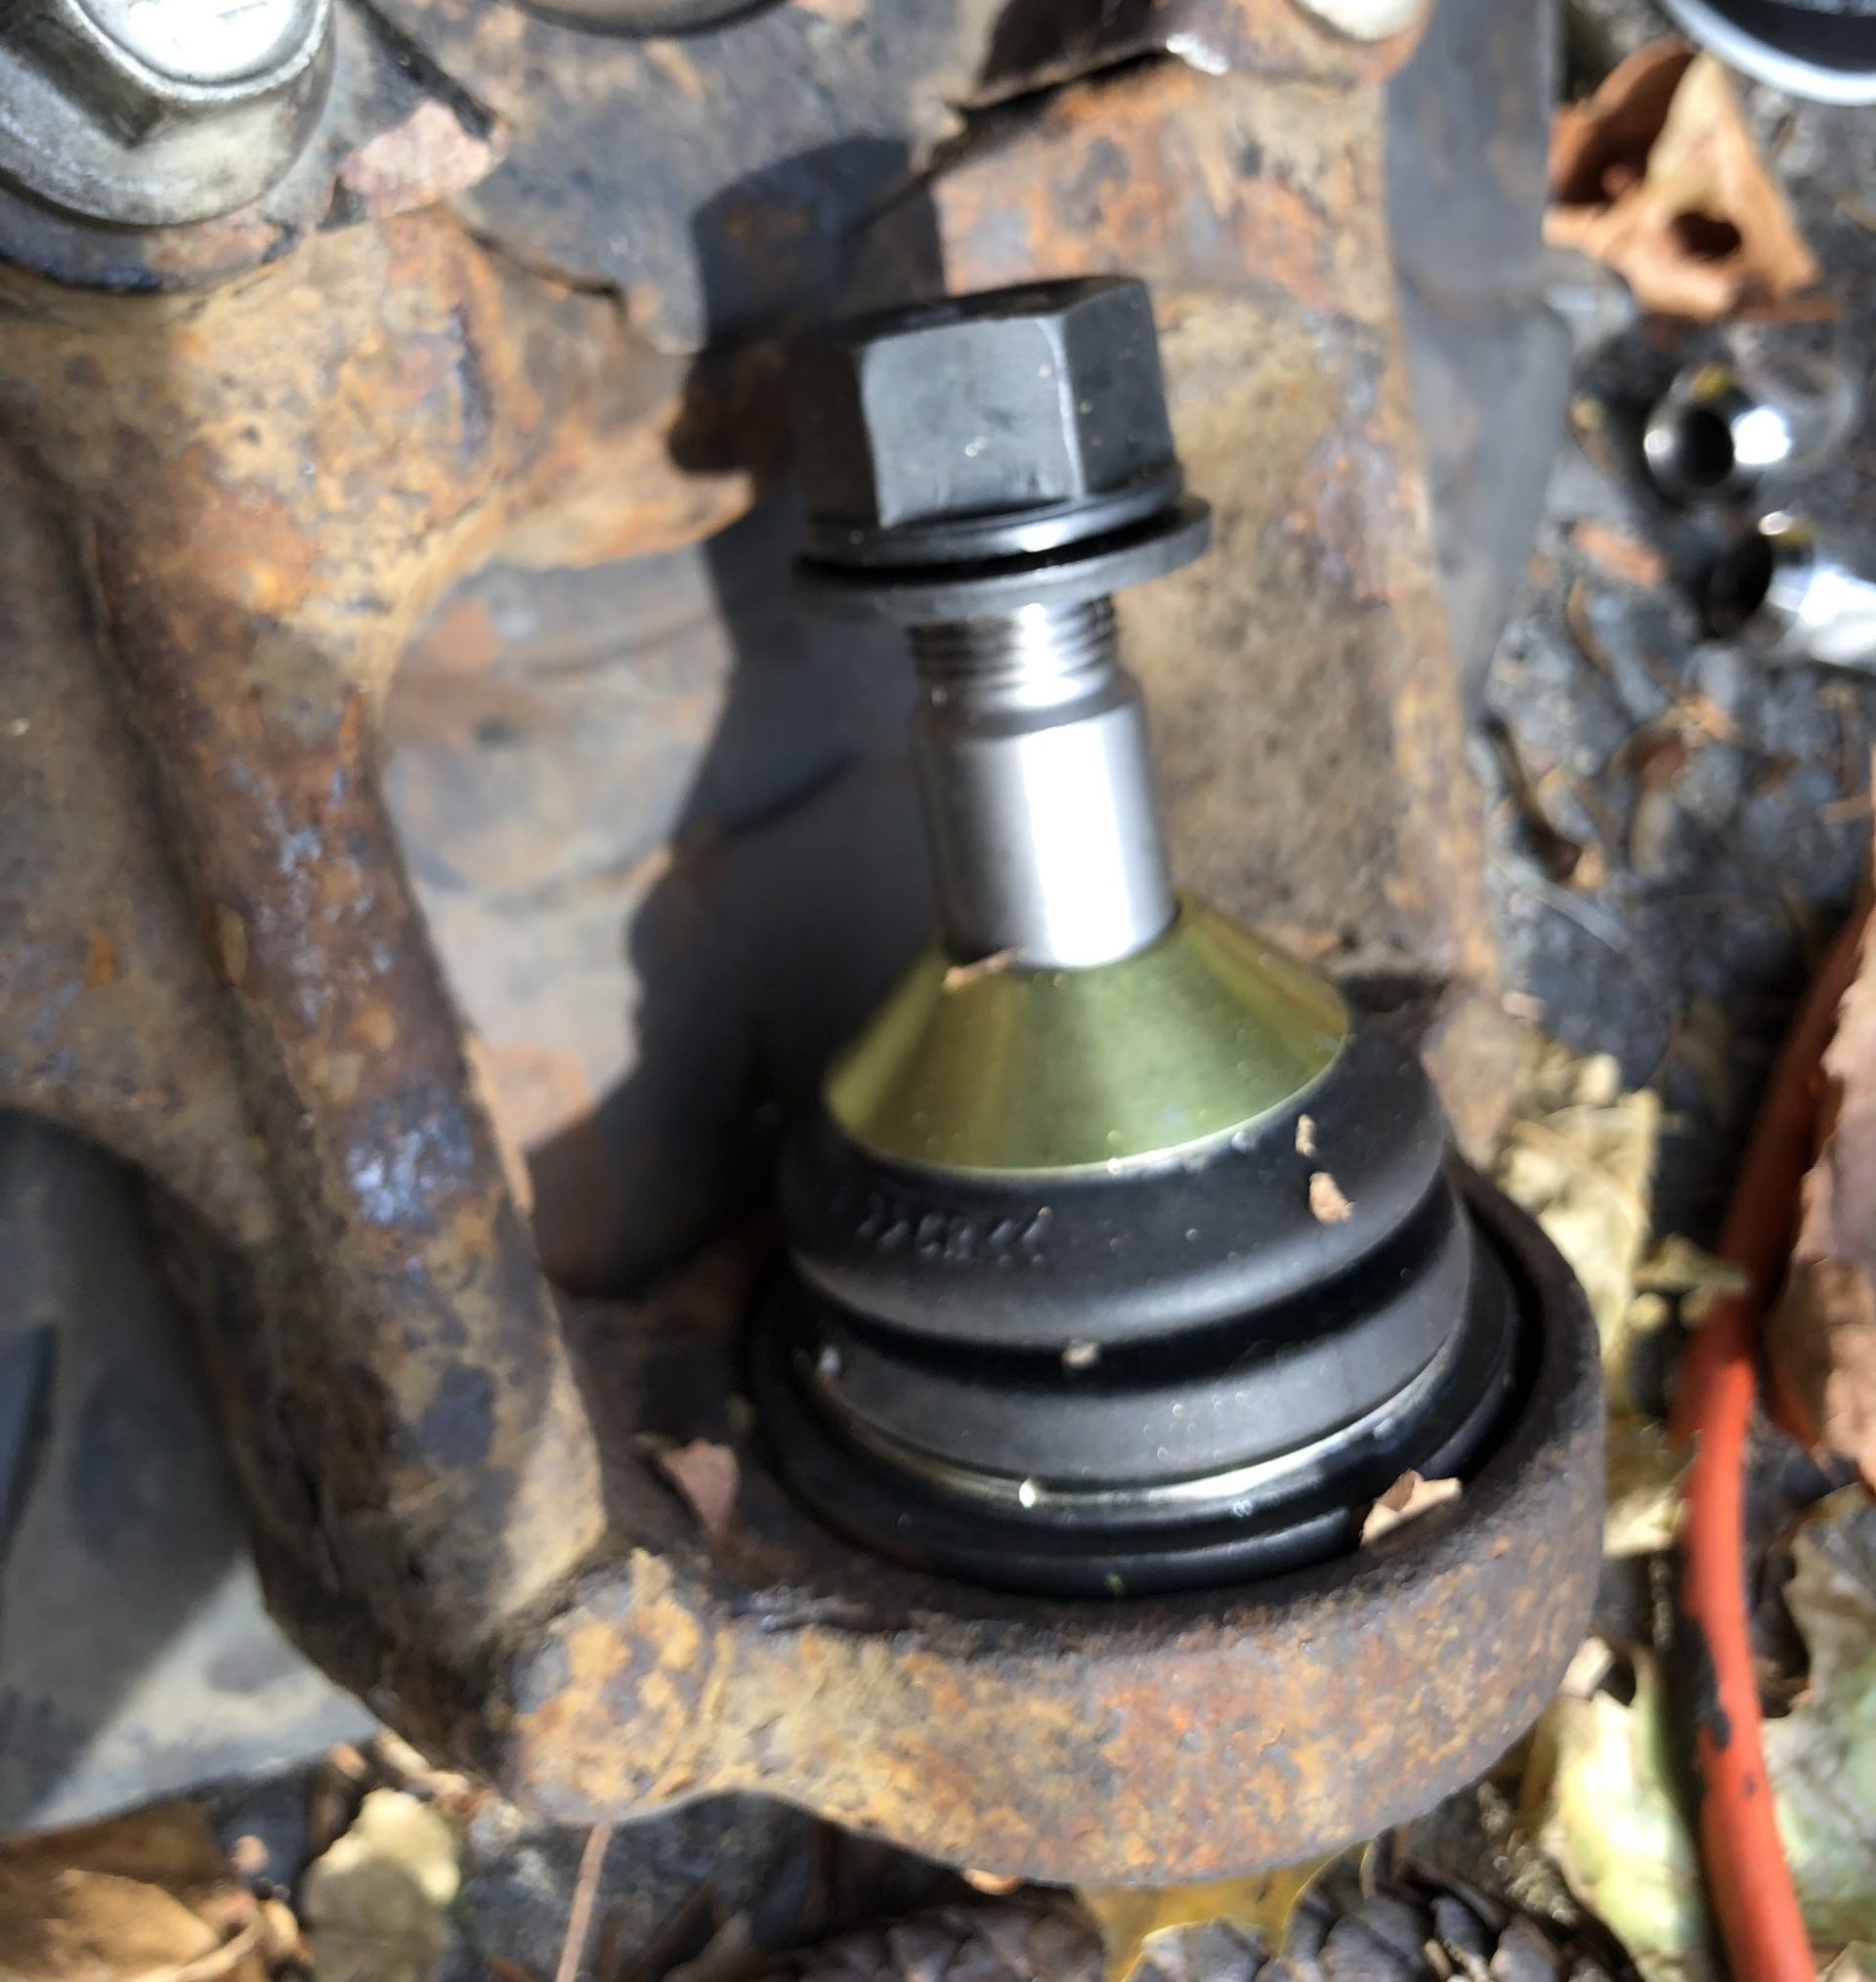
An indoor shop with a vise and a workbench would have been nice. The additional pieces in the service kit gave me all the sizes I needed to get the old joints out and install the new ones without nicking the dust boots (tear one of those and you’ll probably have to buy a new joint, or lose a lot of time to trying to source a new dust boot and then install it). My brother-in-law’s tip was that this tool works best with the impact, and boy was he right. I wouldn’t want to do this job without it.
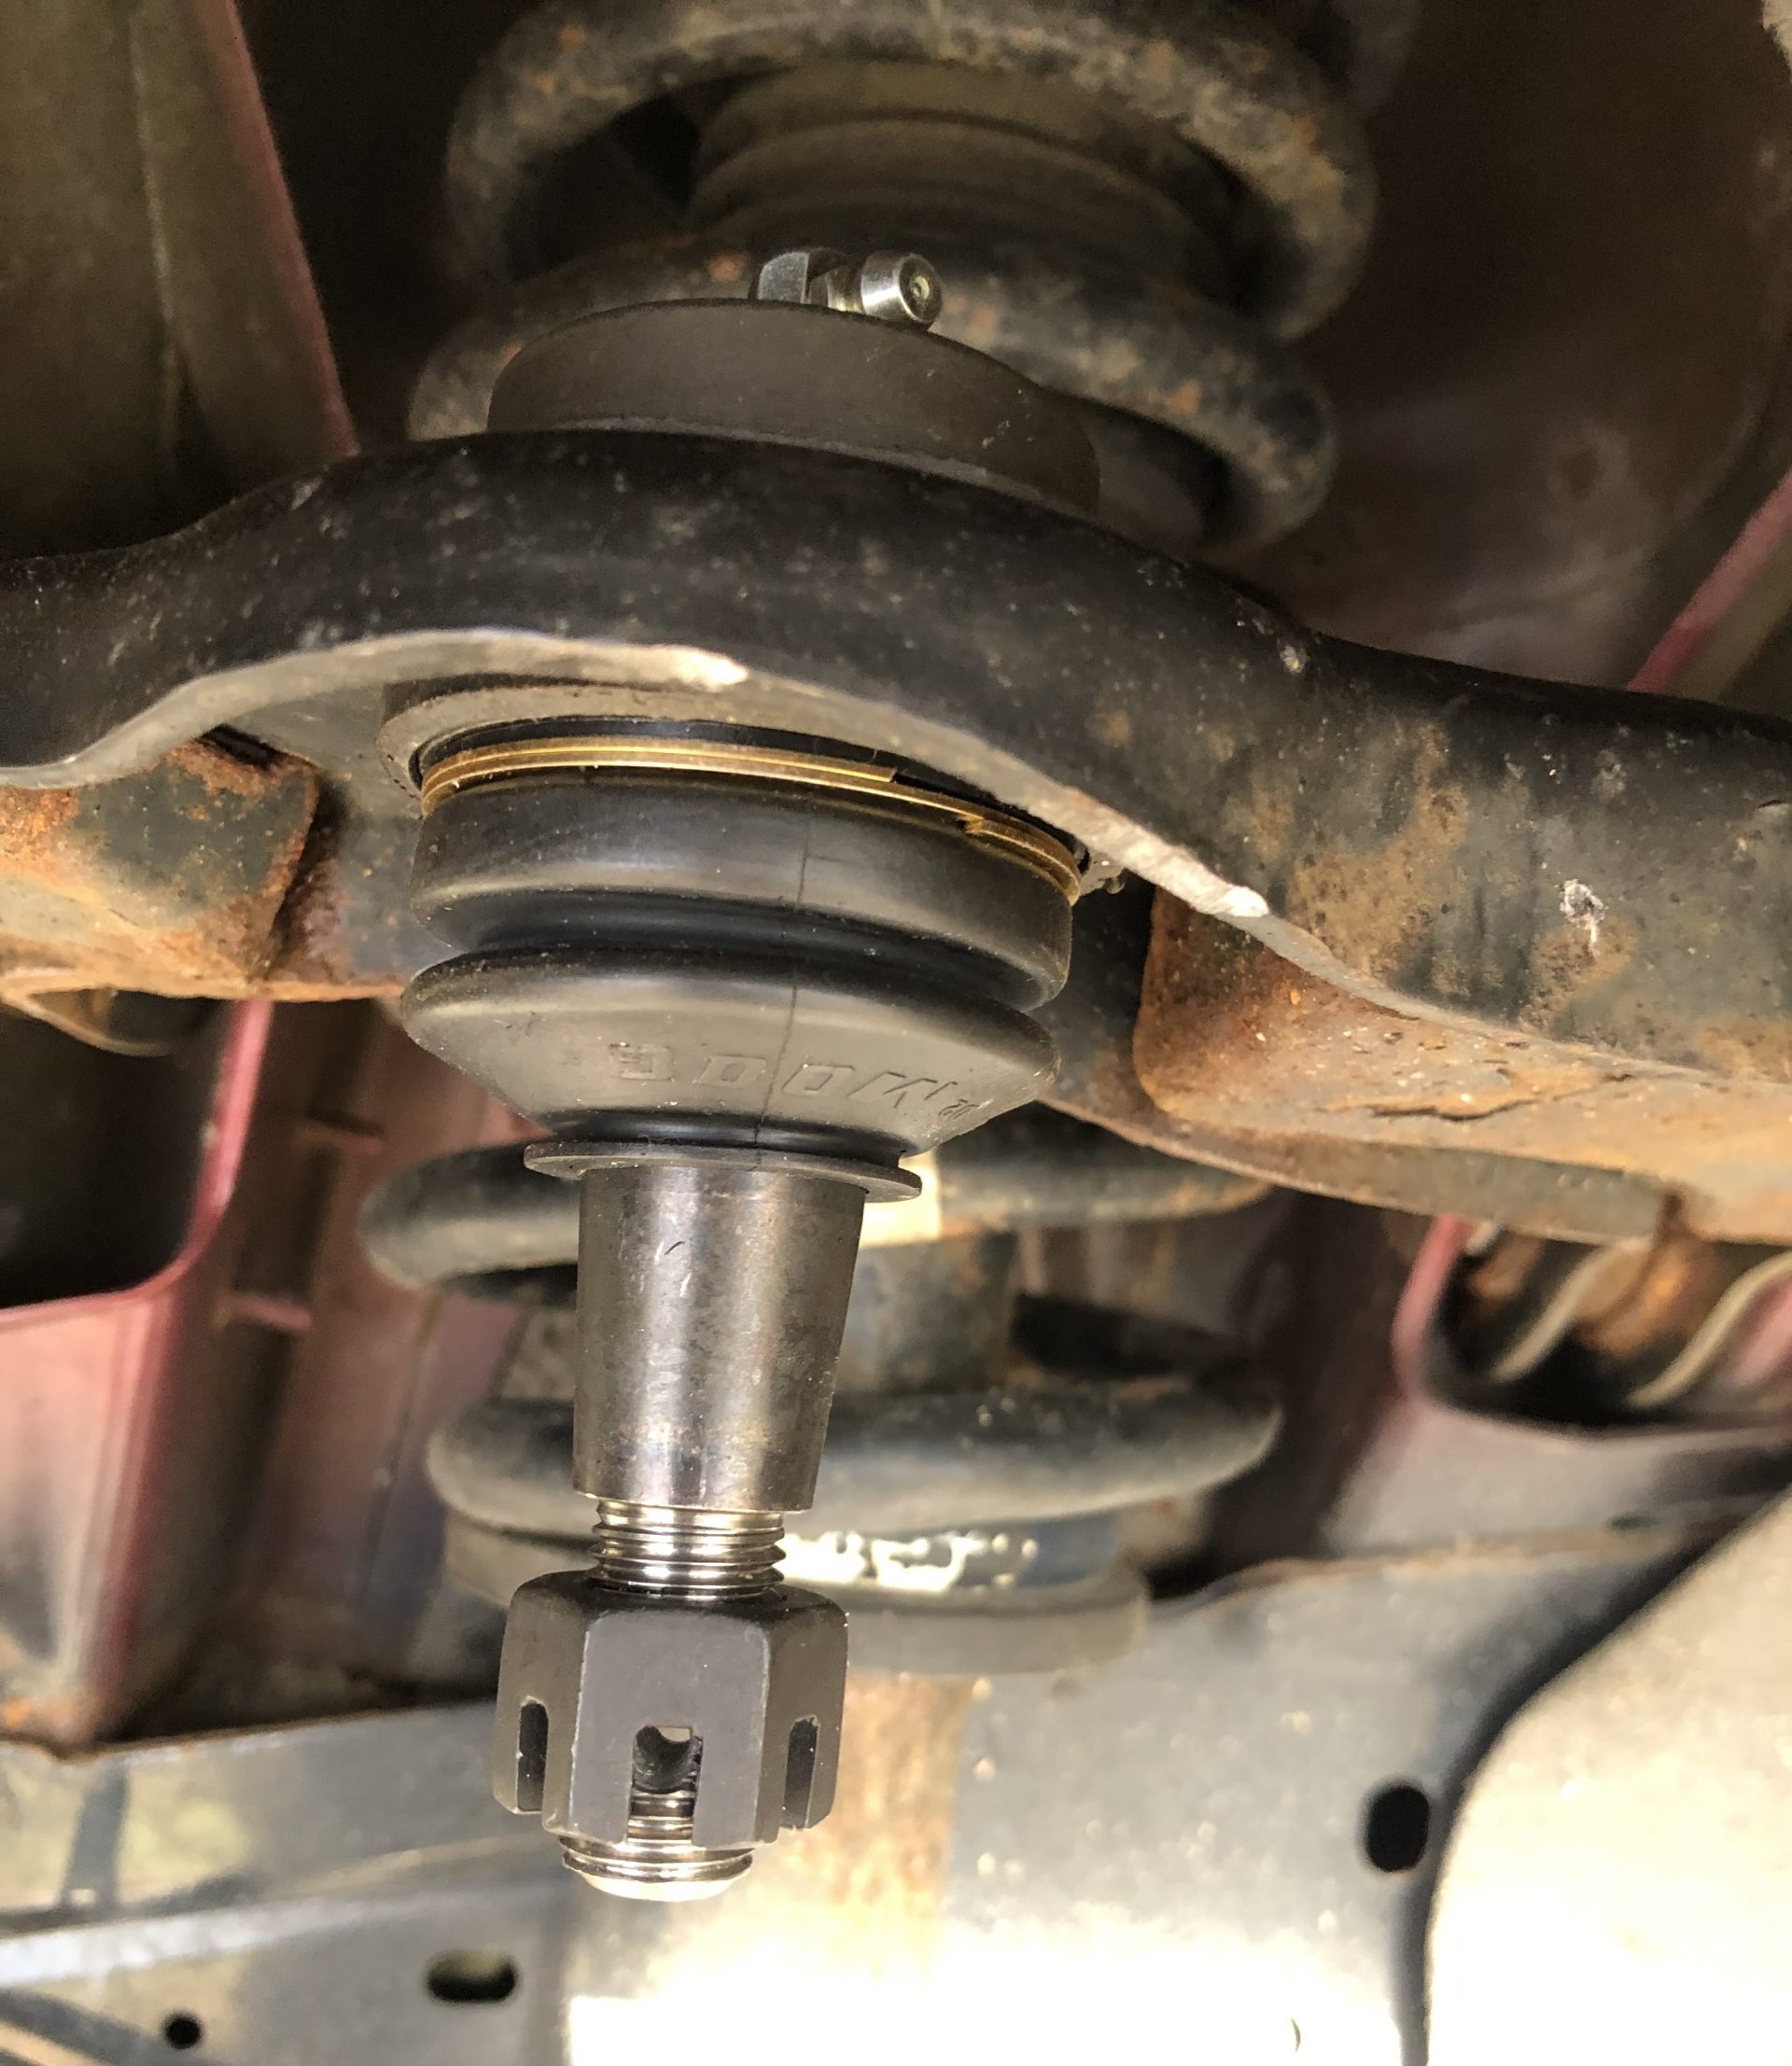
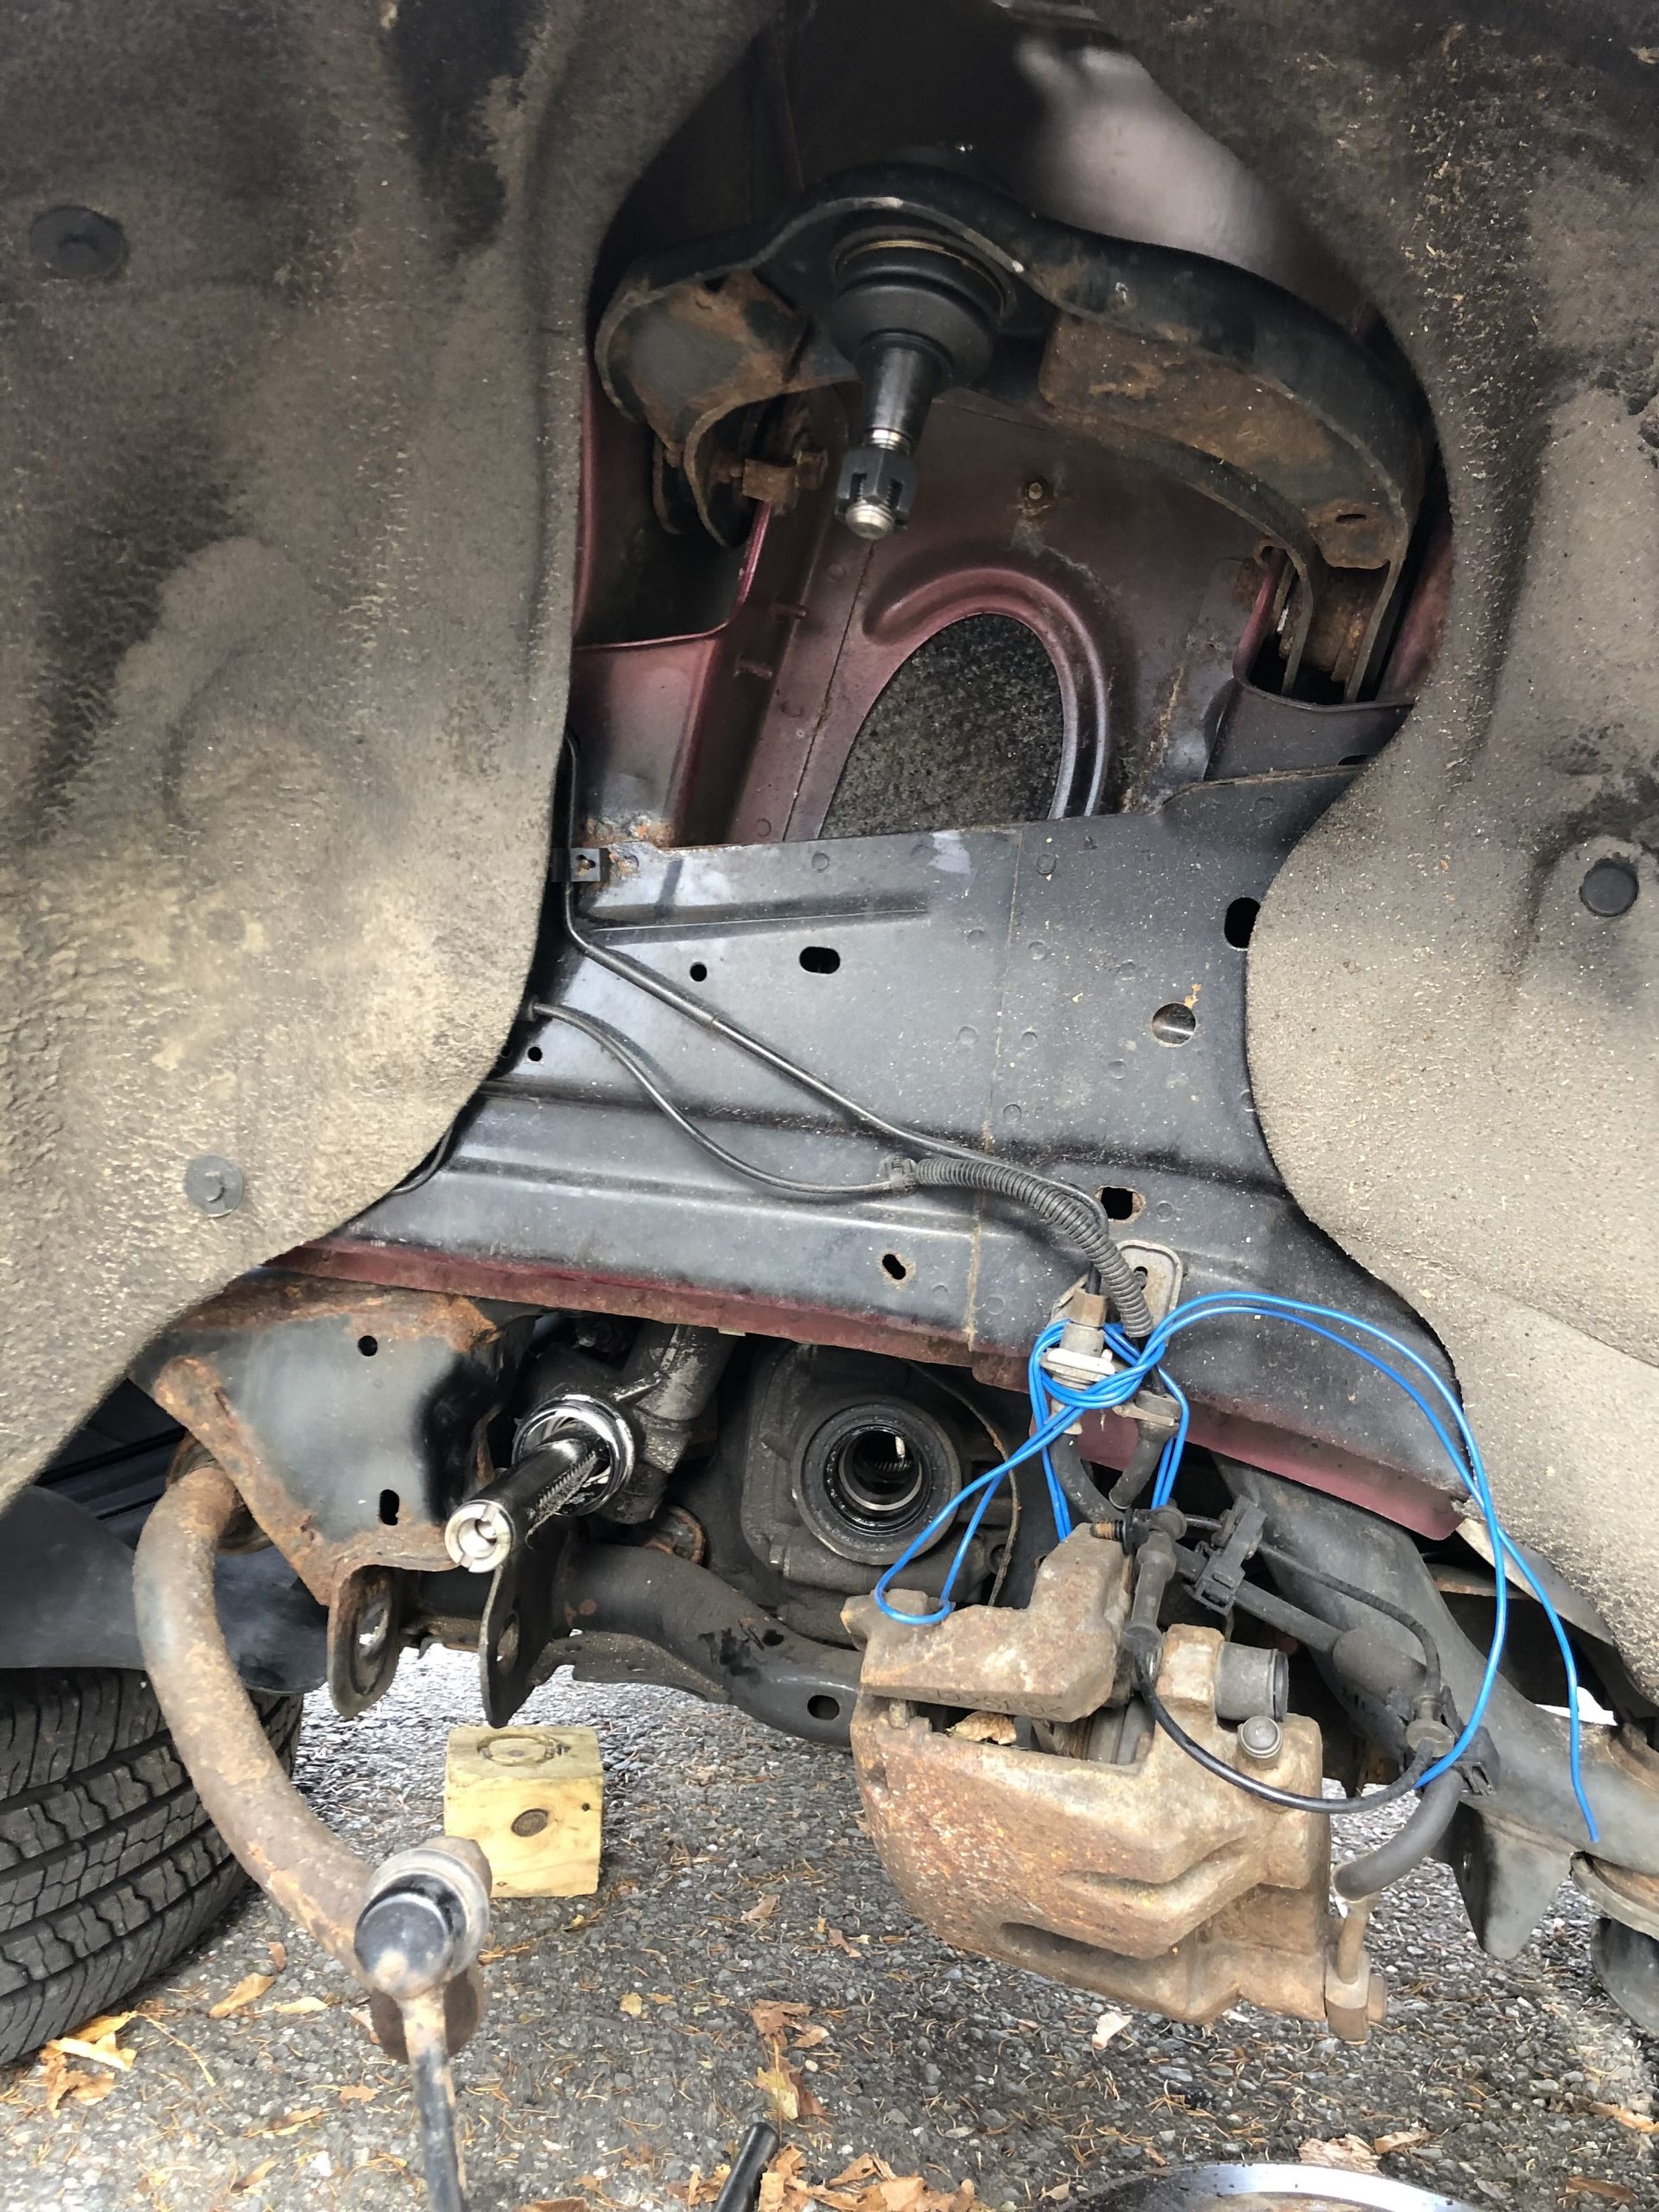
The upper ball joints stay in the upper control arms, so that was a little easier, actually. I just had to pull down on the upper control arm and tie it off with some clothesline, otherwise it kept twisting out of sight because of the pre-load in its bushings. On some other cars, getting chunky tools into a tight spot would make this more challenging. On the passenger side, I found the bad bushings on the upper control arm, which caused a delay, as I had to order a new part that took a couple of days to get here.
Control Arms
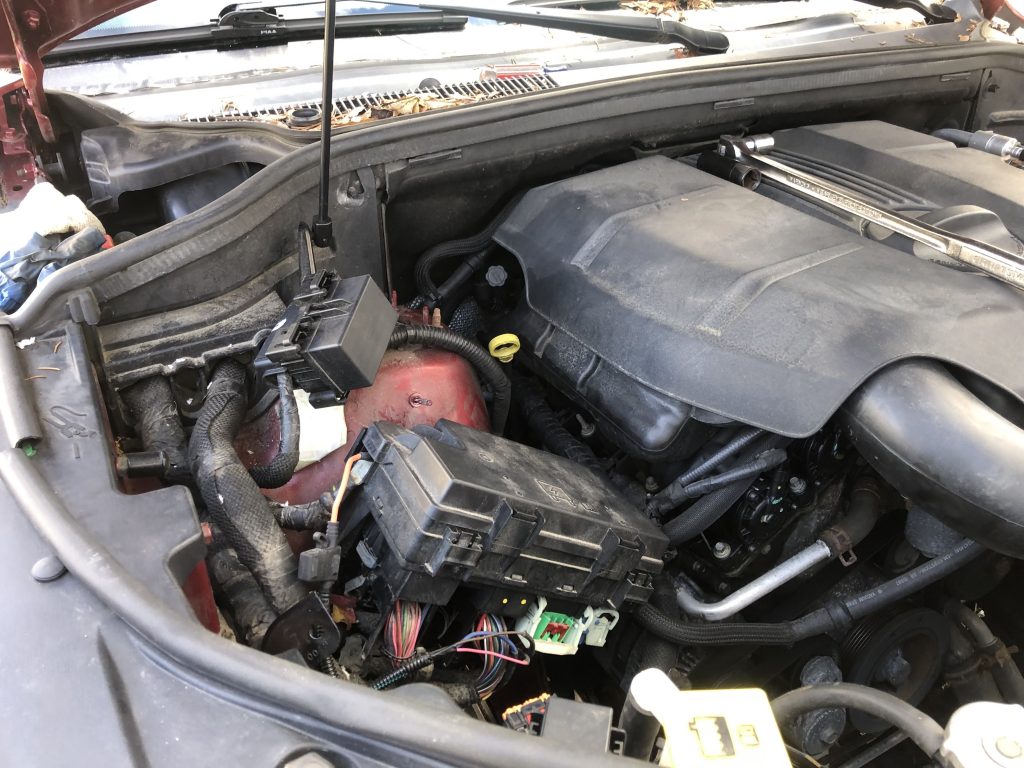
Removing the upper control arm requires some engine bay access to the fasteners. Luckily, this one was on the passenger side, so I tucked some electrical components out of the way for more room to work, but I probably could have done it with them in place. On the driver’s side, there’s more stuff in the way, including the brake master cylinder and steering shaft, so it may be trickier to get at things.
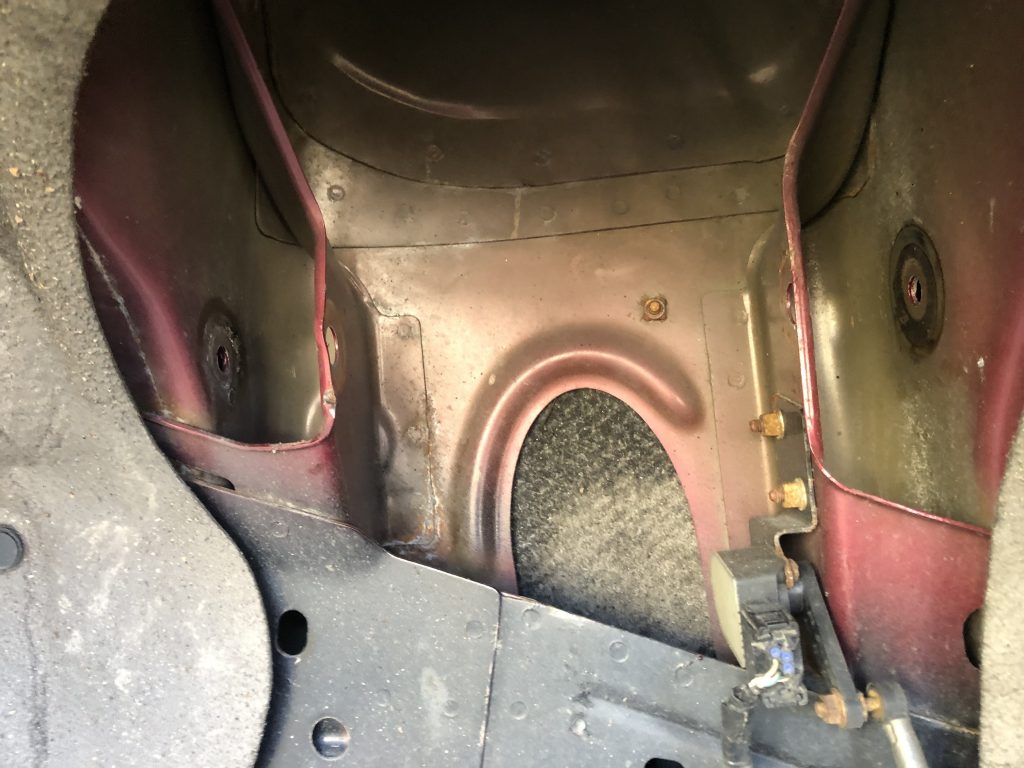
Either way, getting at the rear bolt for the upper control arm means you’re mostly working blind and you don’t have a lot of range to swing a wrench.If you have fancy fine-tooth ratchets, this is one area where they might be helpful. The impact wrench did not fit back here, obviously. This was strictly a hand-tool affair.
There are upper and lower ball joints on both sides, so four removals, and four installations took a while. Since these ball joints have grease fittings, it was important to install the zerks and then pump grease into all the joints, slowly, until it started to bleed out of the dust boot. There are sealed-for-life ball joints that come pre-greased, but I specifically went for the greaseable joints in the hopes of getting more service life out of them. I check them every other oil change.
The Reverse Of Removal
The rest of this job is bolting new stuff in place of the old stuff. Assembled struts are easy to slide back into place and then reach up to the top of the shock tower and hand-tighten the nuts on the studs. The drive axle snaps back into the differential with a push. Because the lower control arms are heavy, I lifted them into place with my floor jack. Fastening them to their mounting points first, at least loosely, made it easier to then get the strut bolted to it.
It would have been helpful if I had marked the rear mounting points of the lower control arms for alignment purposes. I’m sure I would have had to pull, lever, or even use a ratchet strap to get things lined up, but it would have been worth it, as we’ll see. With things hand-tight, it’s important to torque the suspension in a loaded state, as the car would sit on level ground. I approximated this by lifting beneath the control arm. When the car *just* began to lift off its jack stand on that side, it signaled that the suspension had been compressed roughly the same amount as it would be when sitting on its wheels. For the passenger side, I repeated this method and also torqued the replacement upper control arm.
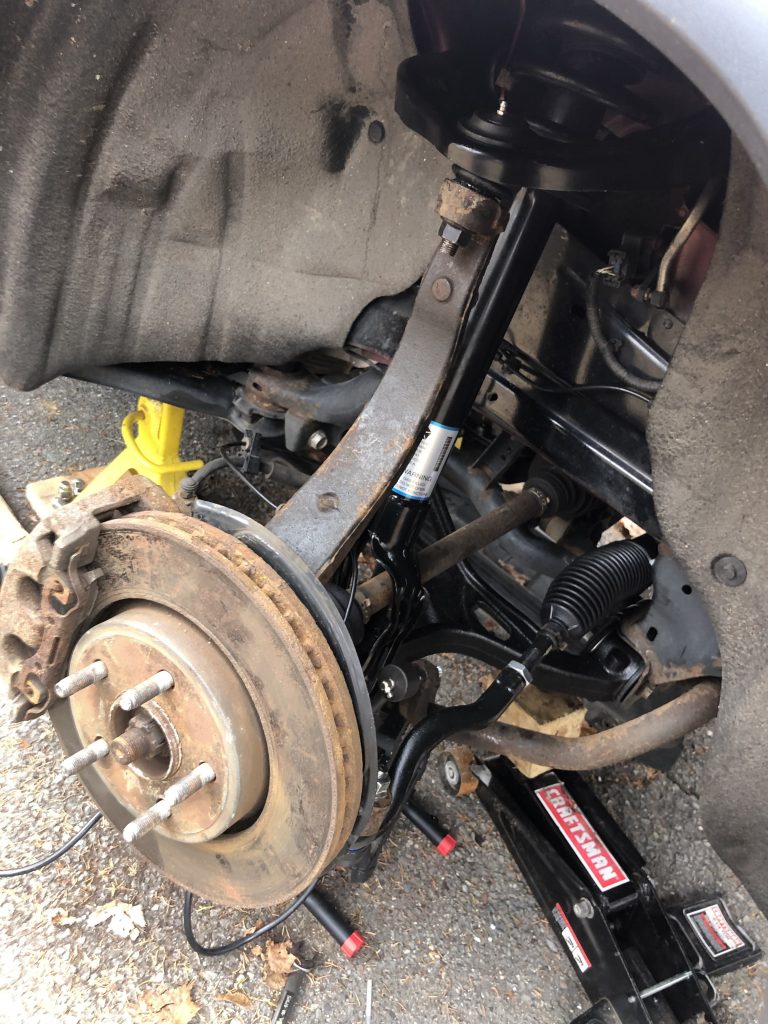
Once I was done torquing the lower control arms to their proper values with an actual torque wrench, I settled the car back down on the jack stands and reinstalled the spindle. The floor jack once again came in handy to push on the swaybar via a block of 2×4, so I could align the new links. These links also required greasing like the ball joints.
Inner tie rods just screw into the steering rack. Once tightened, there’s a notch in the rack itself that’s used to lock the tie rod end in. What you do is hit the area just ahead of that notch, on the tie rod end (not the rack), with a hardened punch, which will deform slightly into that notch. I installed the replacement boot and then tried to roughly match the length of the original tie rod assembly to determine the placement of the outer tie rod end, which just locks in place with a jam nut being tightened against it as you counter-hold the outer tie rod end with a wrench on the flats that are designed into its body. Instead of Oetiker clamps, I secured the steering boot with zip ties. I don’t love this.
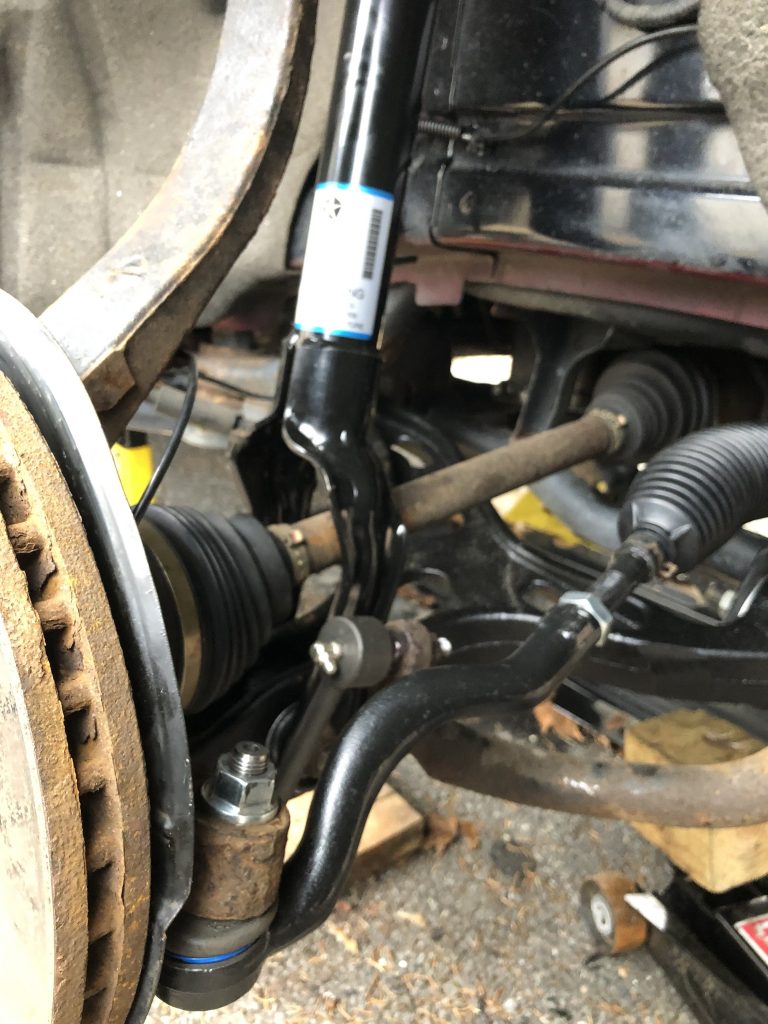
One nice thing about all the replacement Moog hardware is that there were wrench flats and counterholds built into the balljoints and the joints on the swaybar links so I could properly torque the retainer nuts.
Off To The Alignment Shop
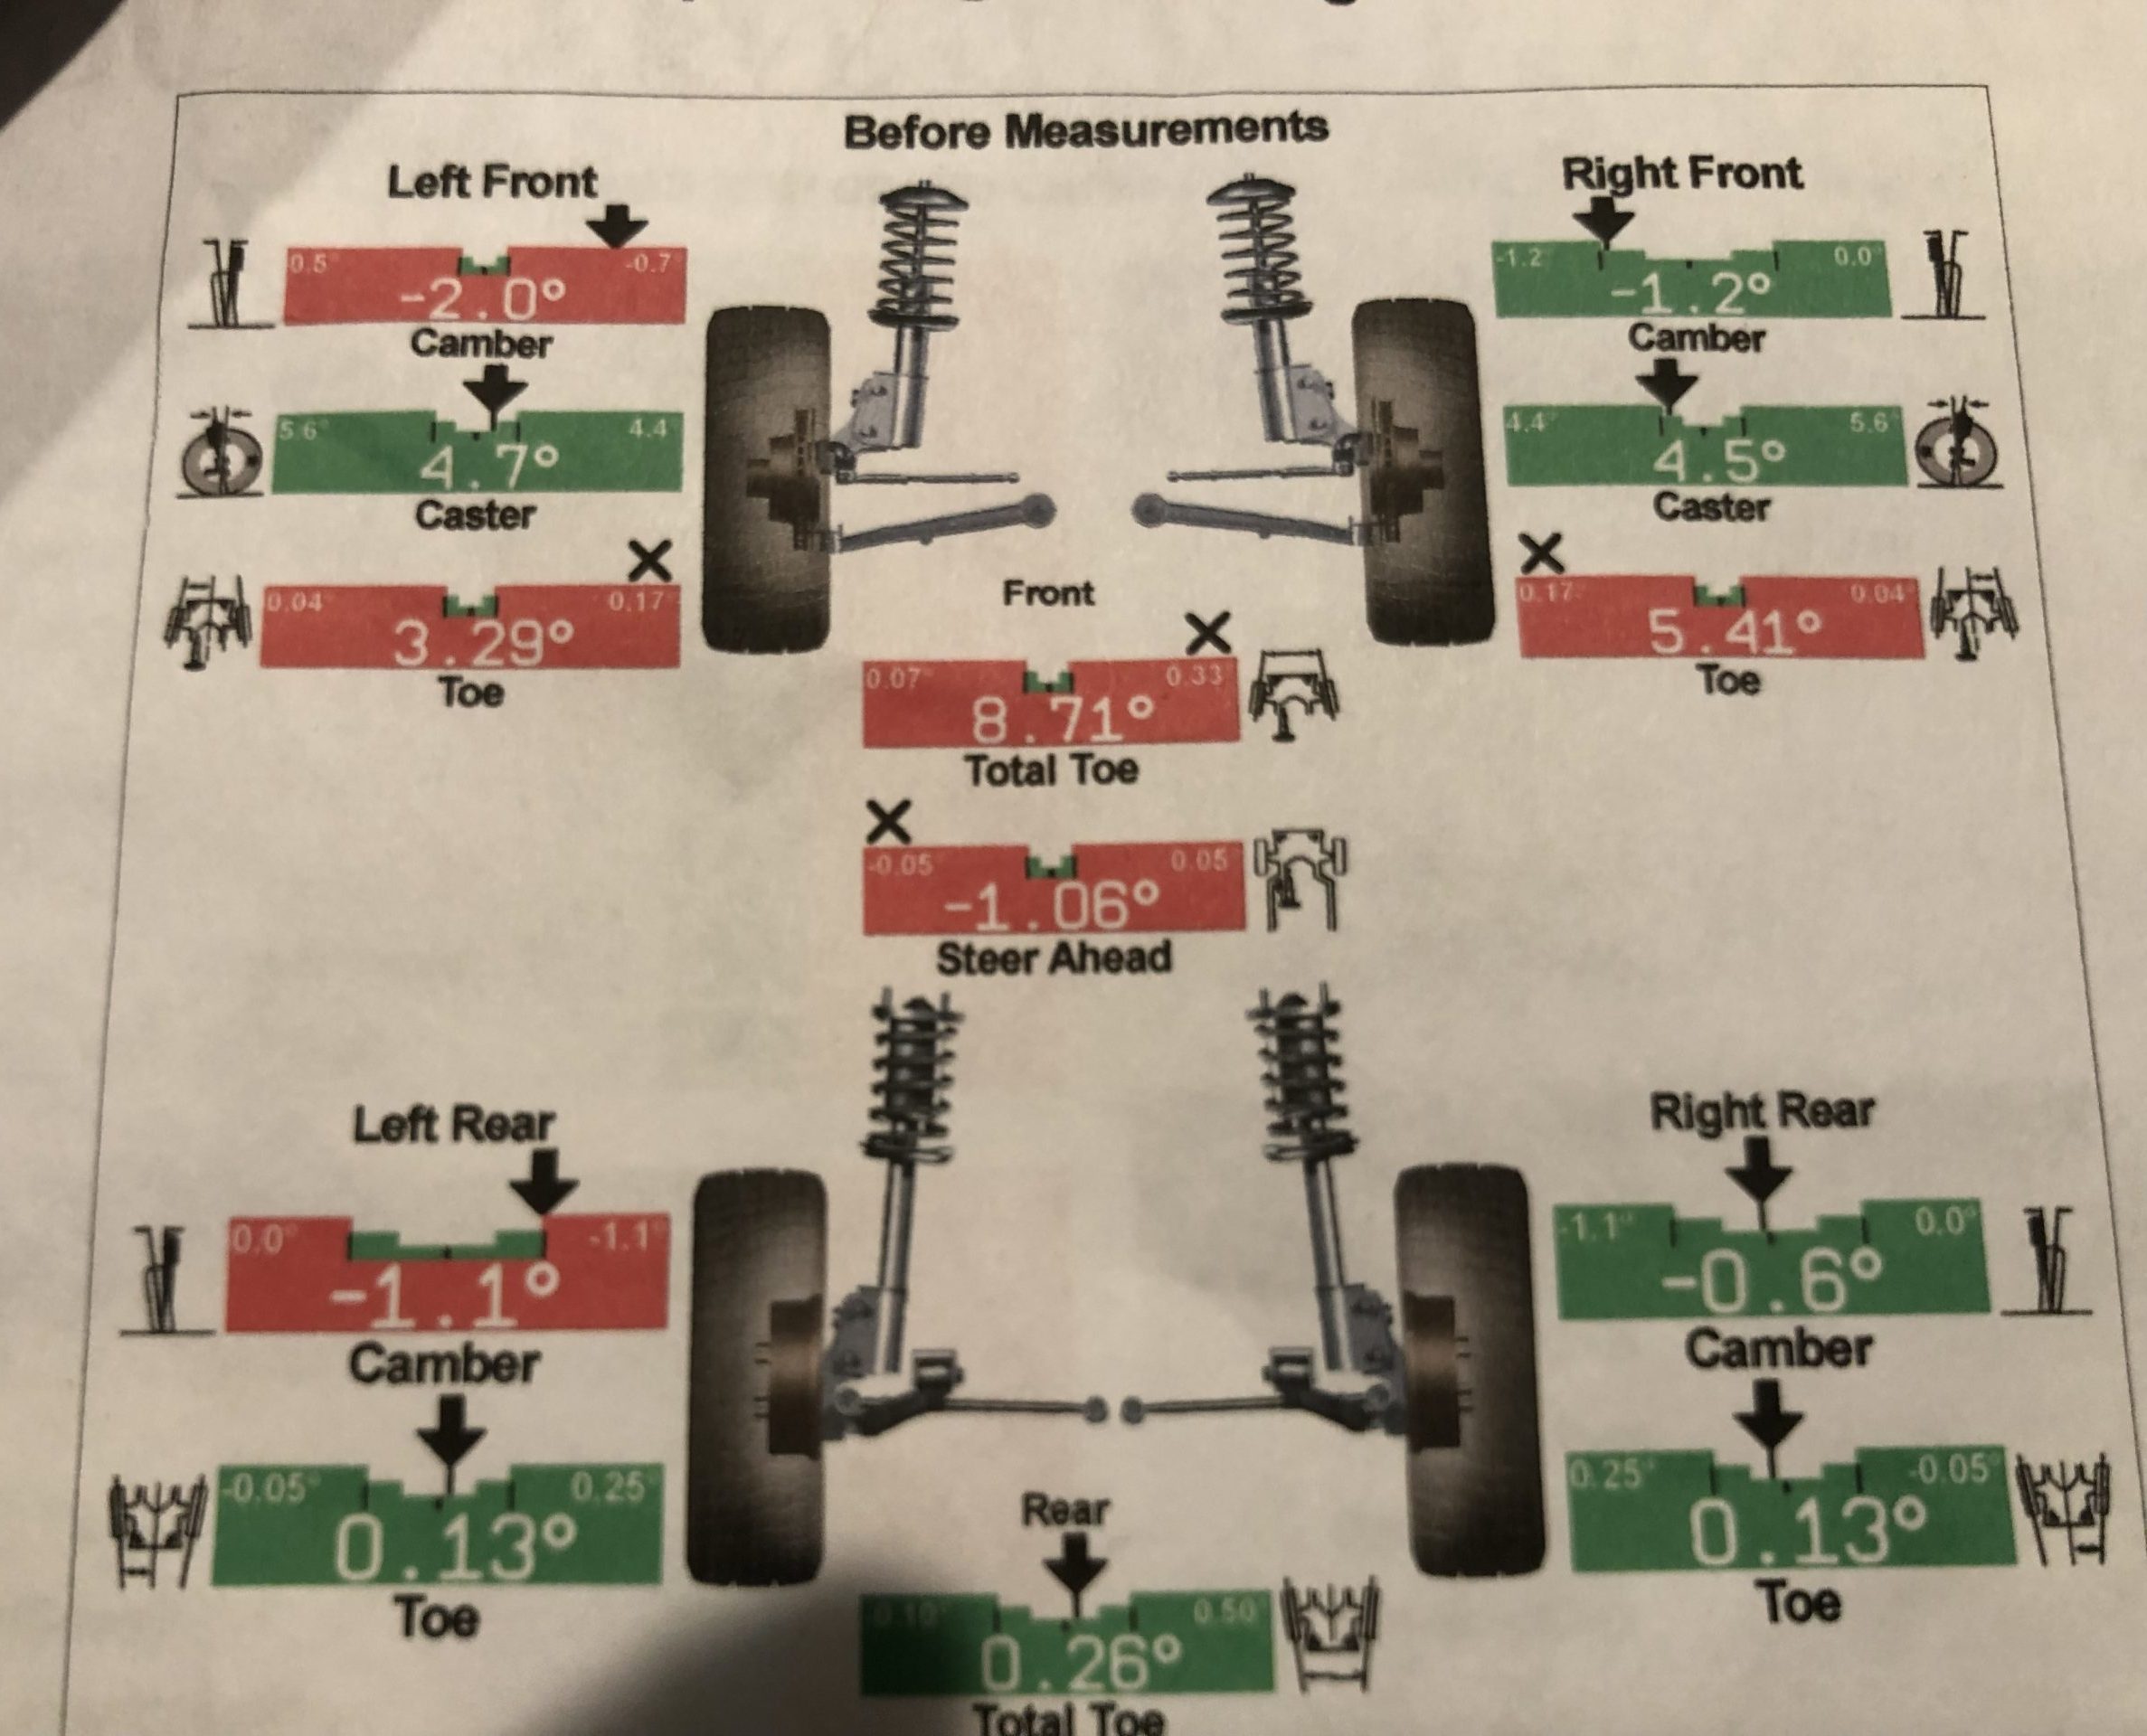
The very night I finished, it snowed. Good thing, because I had an alignment to get to, and the front end was very far out of whack. My quick shakedown cruise down the block and back showed some very spooky behavior. When one side had less traction than the other, the car would slide and lurch a bit unpredictably because the wheels wanted to go in different directions. I had planned ahead to use the alignment shop that’s a half mile from the house, so it wasn’t a big deal, but the low traction surface was helpful getting there.
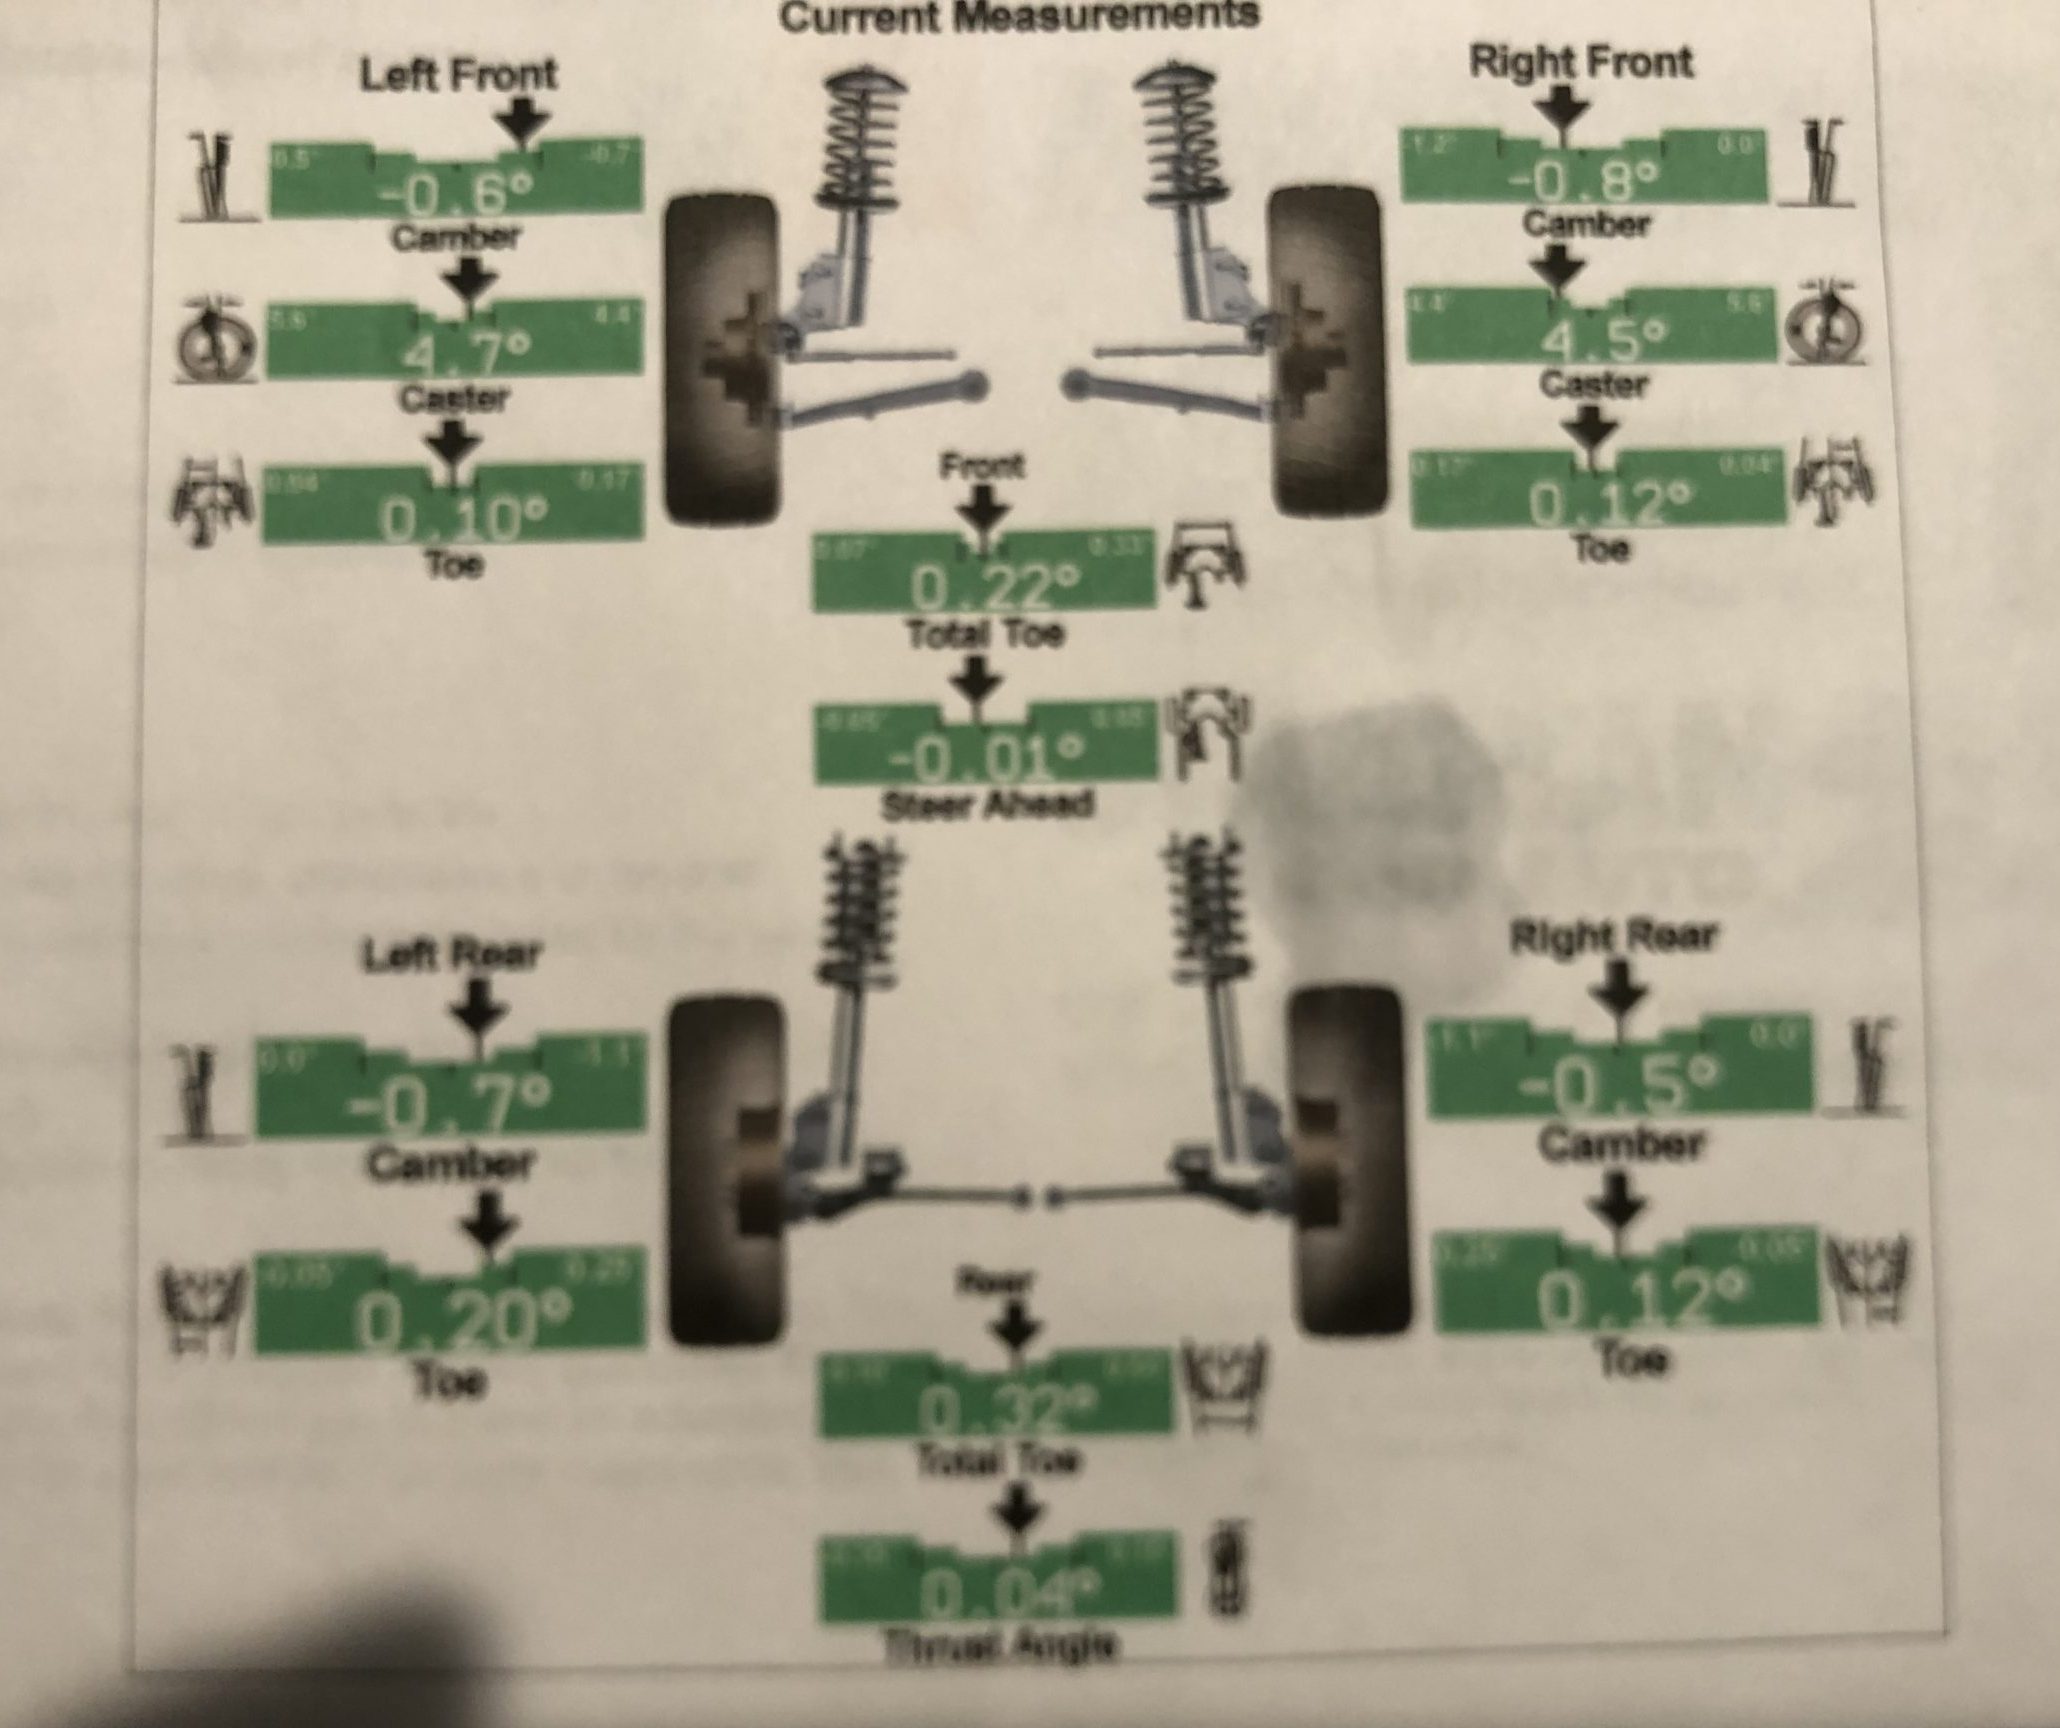
It freaked out the stability control, actually, and I thought I might have to replace or recalibrate something else, but the folks at the shop had seen it before. I dropped it off in the evening, and by 2 p.m. the next day, it was all set.
Satisfaction
This Jeep has got a worn-in feel like the best gear does. There’s still some work left to do, but there are few things more satisfying than making an old car feel new. And while it was a bit of effort, and I got delayed by finding additional problems and a bout of COVID, I was lucky enough that the project could just sit till I could get back to it.

And, now that this Jeep is through this part of its midlife crisis, it’s money in the bank. Cars don’t accrue value like real estate, but keeping up the asset delivers trustworthy utility, which is worth a lot.
Everything else that’s wrong
Rear Shocks
The “feels like new” sensation was short-lived, and I knew it would be, because I have a little more work to do. It’s time to do the same refreshment for the rear axle. In bumpy corners, the back end of this thing does its best impression of a solid axle, skittering off course and requiring steering correction. The job isn’t that hard.
- Shocks $112 ea ($224 total)
- Shock mounts $37 ea ($74 total)
- Swaybar links $22 ea ($44 total)
Oil Cooler
The Pentastar V6 has been known to spring leaks at its oil cooler. This assembly is inconveniently located below the intake manifold and leaks into the cylinder valley before eventually dribbling out onto the ground. The fix, once and for all, is this all-metal part made by Dorman. It’s a bit of labor to get in there, and it looks like I need to replace the seals on the cam phaser actuators, as well. They appear to be leaking, though the rest of the valve cover gasket looks like it’s sealing ok.
- Dorman Oil Cooler $310
- Cam Phaser O-Rings $17 (2-pack)
Battery
The original absorbed glass mat (AGM) battery is getting pretty tired. On cold morinings, it spins the engine over s l o w l y . Almost 12 years is a pretty good run, and though it’s expensive, I can expect the same decade-plus out of the replacement. Its mounting spot beneath the front passenger seat probably helps it live such a long life, but I’m going to thank this one for its service and send it off to the recycler soon.
- Battery $259
Radiator
The radiator seems to be a problem for these vehicles. The original sprang a leak before 100,000 miles at the junction of the side tank and core. The official replacement method includes recovering the AC refrigerant and removing the condenser and a lot of other stuff from the front end. My method slid the radiator in without disturbing as many items. But although I used a Denso replacement, a well-known OEM supplier, it, too, has been weeping for a while. Another fun thing is that this year of WK2 uses DexCool, which makes a complete mess. It’s a good time to flush it, though, when I repeat my replacement technique for a second time. I should probably do the serpentine belt while I have extra room, too.
- Radiator $158
- Coolant $7.11 ea ($30-ish for 4)
- Serpentine belt $15.25
- Tensioner $120
Nav Maps
This is going to be a total pain. The UConnect 4 with Nav worked pretty well, though its maps got out of date with all the road construction that’s gone on in the last decade. I bought an update from Here Technologies, the official provider, and a glitch with that release wiped out any existing map data and failed to load new ones. This is another known issue that others have solved with dogged determination. I have the SD card and forum threads and will try again, but I’ll check first with Here to see if they will admit their mistakes and give me something that works, or assistance in getting this thing un-bricked.
Right Rear Stoplight
This self-inflicted wound happened when one of the newer drivers in my household backed into the trash bin. The replacement from eBay looked great, and I have a rule about not using cheap knockoff replacements for lighting. Marvin and Tammy said it best. Unfortunately, this OEM unit leaks. So I will either reseal it some way and dry it out, or replace it again with another salvage unit.
- Tail light (used) $65-ish
Front Hubs
These are the one thing I didn’t refresh during my front-end rebuild. I’d already done the driver’s side in Spring 2023. Unfortunately, it didn’t live long, and by the fall of that year, when I had the rest of the suspension apart, I noticed that it was already stiff and notchy, just like the passenger side hub, that’s original. I hoped that I’d get a little more life out of the bearings, but they’re now very loud and I can feel play, so I’m not using the car for long trips until this is done. It’s not a fun job. It was an absolute bastard getting the hub out of the spindle the first time. Road salt welds this stuff together so hard that I had to take the spindle off and use a press to get it out. It took a lot of force before finally letting go with a bang. Don’t believe the how-to videos out there that show it just falling out once you remove the bolts. Maybe in Arizona.
I expect that the already-replaced hub will cooperate; we coated it with anti-seize before re-installing. And for the passenger side, I’ll give this tool that O’Reilly rents out a shot. It’s expensive to buy, so I’m glad that companies like O’Reilly support DIY with rentals (and sponsorships of automotive creators).
- Hubs $66 ea $132 total
- Tool Rental $370
Brake Fluid
Take a look at your stop juice. Is it black? Then you should replace it. You see, brake fluid is hygroscopic; it absorbs moisture from the air. And it should look clear and light, like Karo syrup. Some fancy grades will have different colors. Replacing it is easy enough; siphon most (but not all!) of the fluid out of the reservoir with a turkey baster, you want to leave a little in there so you don’t create an air bubble. Then refill with new fluid and start bleeding the brakes at the furthest point from the master cylinder. Bleed and refill the reservoir until you’re getting new fluid from that location, and then move on to repeat the process at all four wheels. It takes a while. But once fresh fluid is flowing from all the bleeders, the waterlogged corrosive stuff is gone, and the braking system will be capable of absorbing heat when you need it most.
- Brake fluid $25/gallon
I’m Milking Every Last Dime Out Of This New Car
That’s about it. I just replaced the spark plugs this past weekend. I found the misfire – there was a cracked insulator on one of the plugs. Lots of center electrode erosion, as well. The misfire codes are cleared and haven’t come back yet, and the engine runs a lot more smoothly and flexibly. I expect my fuel economy to improve. The tires are pretty new and I will be switching to the winter tires shortly, so that will extend the life of the all-seasons. The brakes are good. The factory exhaust is hanging on. I might look at the motor and transmission mounts for giggles, and there are some areas of surface rust that need to be treated with a rust converter and I should apply Fluid Film to protect the undercarriage from the brine they use on the roads here in the winter.
All told these costs will be less than most down payments I see quoted. The labor time, of course, will be hours I can’t use for something else, like writing my great American Novel, but I find this therapeutic, like a puzzle to solve. And I can always let my thoughts drift to that white whale as I heat rusty fasteners to glowing red and swear a lot. This is what it takes to stay on the road. This is what it takes to get the most out of my new car purchase.


The lesson I have learned over the years is to purchase the pre-assembled strut – spring-strut bushing. Yes, pay the extra cost. I’m cheap but after having to grind a nut off of a compressed strut because it was rounded off even I think they are worth the cost.
I love the idea of the pre-assembled struts, but there aren’t that many options, and I’m wary of the quality of the parts used to make the assembly. There are no premium options, and the stuff in the strut towers is hard enough to get at that I don’t want to cheap out there (which is why I went with Mopar strut mounts and rubber isolators – the originals lasted fine and were actually in good shape).
It’s definitely a quicker, easier job to have the assemblies on hand vs. stripping them down and re-building, as I did.
Great read, and good for you for getting all of that work done! We are nearing 150k on my wife’s 2016 WK2 3.6 and it has been trouble free so far with the exception of the infotainment screen failing last year. We’ve really only done oil changes, tires, and a battery. It’s hard for me to believe that these WK2 are becoming “old” to the point of needing these types of repairs!
Yeah, the decades all of a sudden started going real fast. These are good cars to DIY. Relatively easy to work on, parts are readily available and affordable.
I did the front wheel hubs on my mom’s old 2012 Grand Cherokee a few years ago. I can attest that they are EXTREMELY difficult to remove. They rust in there like you would not believe. I have watched other videos of people changing wheel bearings on Grand Cherokees and Durangos, they all seem to have the same issue.
“Unfortunately, this OEM unit leaks. So I will either reseal it some way and dry it out, or replace it again with another salvage unit.”
How about hot glue?
Probably will use silicone or, depending on the plastic, some kind of solvent-based cement that will work like polystyrene model glue.
Battery $259
Ooof! Have you thought about trying to desulfonate the battery before scrapping it?
I have one of those Granite Digital boxes, and it’s worked a treat on a bunch of lead/acid batteries, but I’m not sure it’ll be effective on the AGM. That’s actually cheaper than I thought it would be to replace, even for the big ‘un with the go handle.
The unit I have has an AGM setting and I was able to (I think) desulfonate a pair of very old, fully run down 12V7Ah AGM UPS batteries. They tested out OK but I haven’t needed to lean on them.
Still if you’re just going to trash the battery anyway why not give it a shot? Worst case it explodes in a fireball of molten, acidic lead and you’ll have a great story to tell.
Better yet have Torch do it. You know he will!
The possibility of a hazardous explosion means I’m absolutely going to try something. Maybe with the battery OUT of the vehicle.
I suggest outside, away from structures and leaf litter.
Same place Jeep suggests we park our 4xe right now…
Username checks out.
At $259 for a BATTERY it should for you too.
Oh, absolutely. No criticism intended.
This sounded familiar, then I realized you’re the Dan Roth I recognize from SwedishBricks. Howdy, fellow listee!
I guess I workshopped some of my material on the list! Thanks for reading
It’s an unexpected reminder of how long I’ve been on that list (despite having owned neither red- nor whiteblocks for a few years now).
Our last Volvo left here in 2015, I think. We donated it to Good News Garage, a program that fixes old cars up and donates them to families in need. They determined that, unfortunately, our S60 was not a good candidate because of its sad-face transmission, so it went to auction and they at least got the money. My last red block left town in 2005.
Good News Garage is a great organization!
They took my father’s last 245 off our hands about 10 years ago.
Yeah, I have the scraps to create a podcast episode about them and the experience of donating the S60, I just never put it together. Good org, tho.
Great work and article!
Well done and very impressive! Bravo, good sir.
Thank you. More to come, of course, given that big list at the end.
Just came to say ” cool writeup! ” I personally would never tackle this level of work (just dont have the time, space, or energy, lol) but I loved reading it and seeing your attention to detail. CHEERS!
Thank you! It can be hard to work up the energy, even when you do have the time and space. A lot of the detail is driven by not wanting to go in there twice, too!
A while back I downloaded this game called Car Mechanic Simulator on my phone. If you want a beginner’s guide of what the basic mechanical parts are on a car, and how they generally fit together, that’s quite a good way to start.
Quite a fun way to learn too.
Whoa it’s crazy to replace control arms and then not just buy a full shock spring strut combo.
I have an 05WK and I just did the sway bar bushings and struts on the front end. That clevis pin was going nowhere so I yanked the upper control arms and hammered the old strut out.
Suspension work on rusty cars involves a lot of swearing, some skun knuckles and usually a torch or a sawzall.
Good work on all that.
I do think the 3.7 and 3.6 are pretty solid. Aside from leaky orings on the connection wiring and the speed sensors on the leadframe I’ve been pretty happy with the NAG1 transmission as well.
I don’t like Quickstruts because they’re too inexpensive, which says to me that all the parts they use aren’t going to last like the originals. That’s why I used the genuine Mopar upper strut mounts and rubber insulator.
I guess I dislike Quickstruts more (love the idea, though!) than I dislike compressing springs.
I’m in close to the same boat! What say you about the trans filter/pan and fluid change? How/have you addressed that?
I’ll have to look at the records, but I *think* it’s either on the original trans fluid or it’s had one change in its lifetime. I tend not to mess with trans filters unless there’s an issue. THe last time I checked the fluid, it didn’t smell burnt and wasn’t nasty.
There’s no trans dipstick from the factory, you have to get one from the parts store and then figure out how to use it.
There was an issue at one point where the trans got cranky and maybe pretty hot after a long highway run and shifted weird while also puking a little fluid out its vent line, but the dealership scanned it and didn’t find any clutch performance codes or anything, and it’s been many thousands of miles since then and things are still fine.
Whoa… we don’t get rust here in Arizona, but if you get 3 years out of a good quality battery, you’ve done better than most. The heat kills them.
I started to do stuff like this for my last car as she reached 200,000… then found out how much it would cost me to repair the mechanicals to pass inspection and keep it going as it was, let alone trying to refresh it.
I do miss the car sometimes (often), but taking that money and considering it a down payment for something ten years newer was probably the wiser move.
It’s always situationally dependent. I could have continued to put the money I spent on the Jeep into the S60s. There were several factors at play – the family was growing, those cars were not that spacious, there were other features we wanted our cars to have that they weren’t equipped with, etc. Sometimes, it’s time.
Nice article. I love making old stuff look/feel new. I have a 30 year old ford pickup that gets whatever it needs to keep it running tip top and have kept up with the body work as well. There is something very satisfying about not letting a car just decay. I just showed my old Acura some major love with a full brake job including pads, discs and a couple calipers. I was going to do some steering work preemptively, but was told it still looks great even with 150k. Some day..it is just amazing how good that 18 year old car still looks. I think about what 20 year old cars looked like 20 years ago and it was not pretty.
Excellent article! Nice to see an in-depth DIY run through of refreshing a used car to bring it back to “like new” status. Sure beats throwing money at a new car.
That’s cool. I didn’t know they had a rental for something like that. I think I have a front hub bearing on the way out and this would come in handy. I have a cheapie HF press but it’s often more trouble than it’s worth.
An incredibly detailed description of what you did. And it’s very well done, which isn’t always the same thing. My 2017 Colorado has 60,000 miles and I’m beginning to think I’d like to keep it for another hundred.
King shocks to replace the DVSS. I like them, but can’t rebuild and cost more than King. Or the other guys, there are choices. The clutch packs should concern me apparently. Otherwise pretty Rock solid in terms of future.
Is it only the aftermarket DSSVs that are rebuildable? What’s Multimatic have to say?
I did similar to my old Cruze that made it to 250k miles in my hands. Having some major repairs looming and my having more leg discomfort daily driving a manual car led me to replace it. No regrets, that was a great car.
Good on you. The maintenance manager at our factory ran his Cruze 300k+, commuting 80 miles a day and replacing the turbo and associated parts as well as the valve cover multiple times. On the other hand, my brother-in-law lost his shirt constantly doing major repairs on his Cruze which didn’t even make it to 80k before needing major engine/cooling system repairs. Lucky for him, it got totaled by hail.
Those cars needed owners to be on top of maintenance to make miles. I went through 6-7 water pumps, 1 valve cover, 1 intake manifold, 1 turbo and lots of rubber bits. Plus the suspension work I chose to do.
The water pumps on the turbo ones are ticking bombs. Replace it every 50-70k miles and the heater core hoses every 100k. Inept techs damage those hoses, the system gets air in it and starts a cascading failure. Ask me how I know that one.
I think the car just milked you, not the other way around! Joking, I enjoyed the article!
I did the same thing with the one new car we ever bought, a 2010 Mazda 5. Has 175k miles now and steering/suspension have all been replaced, in some cases more than once. I learned to start buying better, more expensive parts with this car. Also learned some new things, like pressing ball joints and wheel bearings with this beast of an antique mechanical press my junkyard neighbors gave me.
The plug-in electric impact is essential for a lot of this work, unless you want to be sore for about a month. A great alternative to a gigantic compressor taking up space in your garage.
Yeah, the wheel bearings. Are they pressed into the knuckles? If so, just buy new knuckles with bearings pre-pressed. Saves a ton of work. A similar sitch to David’s QuickStrut suggestion.
so my Bostitch 6 G pancake compressor can’t create enough pressure to drive an impact wrench? someone should tell it
Go at the lower motor mount nuts on an ’04 Sienna from the north and then ask your compressor that question.
I was making lights dim all the way out in Peoria.
it was a genuine rhetorical question. so I guess the question what is the torque of both tools.
Your little compressor will run an impact, but not for long. Impacts use a high volume of compressed air. Running an impact with the same size air hose I use for my brad nailer makes it pretty unhappy, and the cycle times to recharge the tank are long.
It depends on the SCFM output at 90 PSI for your pancake vs the rating on your impact tool. My old 6gal pancake ran one just fine. Same with my newer 5.2gal Makita.
Also don’t get a shit impact. An IR 231C is a great deal for the money, they’re heavy but pretty efficient and durable.
I think any 110V compressor is going to struggle with the pressure and volume an impact needs. I have a Craftsman compressor w/25 gal tank AND an Ingersoll Rand impact and it just….doesn’t do it.
I have a 30 gallon compressor. It runs a 1/2″ stubby impact just fine. Even with 100 feet of hose and a dryer in there.
The biggest difference was using high flow fittings (I used Milton V style due to local availability) throughout the whole air system. Impacts need high pressure at high CFM to work well. The pressure and flow drops caused by standard fittings are enough on a smaller compressor to reduce the hose end air availability to a trickle. The high flow fittings close to the same inside diameter as the hose turned made everything work much better. Spend the money on them, I guarantee you won’t regret it.
Aha! I hate the crappy hoses I have, anyway. Eventually, I’ll update all of that. The electric impact is not compact, but in a lot of ways it’s easier to wrangle than the unruly airhose and air impact that doesn’t have the same amount of torque, anyway. Electric tools are pretty great.
Swivel air fittings to the rescue. I have them on my undercoating sprayer, stubby impact and 3/8″ ratchet. The hose goes generally where it’s out of the way. The best thing is the tools then fit into spaces. I set up my system about 10 years ago to mainly spray rustproofing. It took a few iterations to get it as user friendly as it is. For my uses it works fine. The overhead hose reel and swivel fittings were the biggest quality of life improvements.
Bearings are integral to the hub – I’ll just replace the hubs. The problem is that the hubs fuse into the uprights/knuckles with rust and are a real bear to remove. New knuckles are hundreds of dollars. I will use that tool that O’Reilly rents that’s similar to a Hub Tamer – that should work a treat.
Ah, so it has bolt-on hubs like a GM or VW. Try unwinding the bolts but not all the way, then whack on ’em from behind to push the hub out. You might have to turn the wheel (like you do for the caliper bolts) in order to get solid swings with a sledge.
Oh yeah, I tried a lot of stuff the last time I did the hub on the driver’s side. The only way to replace it was to take the spindle off and get it on a press, where it FINALLY let go with a bang.
That rental tool does essentially the same thing as swinging a hammer at the back side of the hub, but it uses mechanical advantage and a couple of stiff metal plates to get it unstuck.
(On one of the balljoint closeups in the article, you can see the hub retainer bolts, btw)
I gave up on my wife’s Sienna’s front wheel bearings. Even a seasoned pro who’s done thousands of them with his kick-ass press told me never to bring him another one. So I just buy the whole damn knuckle from Rock and pray to the Gods of Internet Commerce that it lasts.
Factory parts are usually the best but unless you plan on driving this rig to 380,000 miles you don’t need the new parts to last 190,000. Its smart to make an educated guess of how much longer your gonna drive it and choosing parts you think will make the trip. Sounds like you basically did that.
Great article! It’s nice to see The Autopian provide the perspective of a car owner who’s willing to put in the extra work and resources like this to keep it running. And once you get past the more critical repairs, I highly recommend new motor mounts; they made a world of difference in my ’97 Grand Cherokee.
What were the symptoms of needing motor mounts in your ZJ? My wife’s ’97 ZJ with the 4.0 is still on it’s originals at 185k miles.
Mine has the 5.2L V8; it felt slightly rough/shakey when idling.
This is actually a good example of how good modern corrosion inhibitors are. For an 11 year old car, it looks great.
I live in NY, so my car looks similar if not a tad worse, despite being only 7 years old. The only thing I’ve really struggled to break loose was a wheel bearing; I ended up having to remove the whole knuckle and putting it in a press. 20 years ago, disassembling an entire corner worth of suspension on a 10 year old car, would have been a nightmare full of torched bolts and probably at least one needing to be drilled out. I didn’t have to do any of that.
I often feel tempted to buy another new car, but it’s fine right now. I don’t love my car, and every couple of months it needs some sort of repair, but seems so much better than shelling out for what they want for new cars now.
Yeah, I was anticipating the comments about “did that spend the last decade in the ocean” from people who don’t like the sight of any rust, but honestly, this thing has been good on the corrosion front, too, though I have to address it soon so it doesn’t progress much further. This is all just surface rust. The thing is solid.
how has the pentastar v6 treated you? what do you think about the performance in general? I sometimes consider picking up a ram with the v6 because realistically that is all i need. But then i consider dealing with all of the downsides of a large truck without any of the v8 upside just seems .. silly?
I have had the 3.6L in my jeep wrangler for 12 years and my minivan for 4 years and it has been a fantastic motor. Plenty of power. Surviving off roading in -20 to 116 degree weather. lots of skinny peddle in the off road parks about 5 time/year. I have had some cooling leak issues in my jeep one and when there was a recall I had the plugs changed because the intake was off for the recall.
The Pentastar V6 has been outstanding. This one is hooked up to the NAG or whatever it’s called 5-speed auto, and it could benefit from the ZF 8-speed they got starting in 2014, but otherwise it’s a solid engine. The lower oil pan is showing some rust, so I’ll replace that. It’s easy to do, no heroics required, just unbolt the old one and bolt on the new one, and it’s cheap.
The repairs it’s needed have been all within the realm of “not a big deal,” in my mind, though I guess the Pentastar Tick could be an annoyance for some people. No timing belts to service, pretty efficient, runs on regular gas, relatively easy to service.
The 4700 lbs of Grand Cherokee is kind of a lot for it, but if you’re not hurried, it’s fine. It can still tow over 7K pounds, so I think it’s plenty. We’re spoiled for power and speed these days. No hesitations recommending it, but do plan to spend some here and there to maintain it – you know, as you would any vehicle.
I didn’t want to feed the Hemi, although I love the sound and the torque curve.